Thursday, 31 May 2012

MANWICH CLONE RECIPE

Someone recently told me that a variety of convenience foods (that we all take for granted) are not readily available to cooks living outside of the USA; simple things like good old hot dogs, graham crackers, ranch mix, canned pumpkin, Crisco and  Manwich ( plus MANY others).

I don't buy many convenience foods, but every once in a while, I  find something like Manwich comes to the "quick snack for the grandkids" rescue. The down side is that it can be expensive when feeding a crowd, so I was very happy to find this great "clone" recipe. 

TIP:  When feeding a crowd,  I usually serve these sandwiches, "slider style", on small dinner rolls.

8 ounces tomato sauce
1 cup ketchup
1 tablespoon dried onion flakes
1 tablespoon finely diced green pepper
1 teaspoon salt
1 teaspoon sugar
1 teaspoon prepared mustard
1 teaspoon chili powder
1/2 teaspoon dried minced garlic
1/4 teaspoon celery seed

Mix everything together and add to one pound of (browned and well drained) ground beef.  Simmer for 10 minutes then spoon onto  buns and serve.

Tuesday, 29 May 2012

FRESH MANGO CAKE

This cake brings rave reviews and is a nice change from the predictable pineapple upside-down cake. The cake is sweet, very light and tender and the fruit keeps it deliciously moist. We ate it warm, with ice cream after dinner tonight.


Preheat your oven to 350F and spray a round 9" x 2" cake pan with vegetable spray. Line the bottom of the pan with parchment paper and then spray it again.

BOILED SYRUP LAYER (goes under the batter)
1 cup white sugar
¼ teaspoon lemon juice
¼ cup cold water
~~~~~~~~~~~~~~~~~~~~~~~~
Arrange one pound of small diced mango in the bottom of the parchment lined cake pan, and sprinkle VERY LIGHTLY with some cinnamon sugar. Note: I threw in a few maraschino cherry pieces for color.

In a heavy bottomed  sauce pan, stir 1 cup sugar + lemon juice and cold water together. Bring to boil on medium heat, stirring once in a while, until it starts to turn amber. Watch carefully, because once it starts to turn color, because it will darken quickly. After it turns light amber, pour evenly over the mango and set aside while you make the batter.

CAKE LAYER
1½ cups all purpose flour
1¾ teaspoons baking powder
½ teaspoon ground ginger
½ teaspoon ground cinnamon
½ cup whole milk
2 teaspoons vanilla extract
½ cup butter (room temperature)
1 cup packed brown sugar
2 large eggs
.
In a small bowl, mix flour, baking powder, ginger and cinnamon together, set aside. In another small bowl, mix milk and vanilla extract, set aside.
.
With electric mixer, beat the room temperature butter for one minute, or until it is light and fluffy; add brown sugar and beat on high for 3 minutes. Reduce speed and add eggs, one at a time, beating well after each. Make sure you scrape down the sides of the bowl once in a while.

Now you need to mix in the milk mixture and the flour mixture, but make sure you alternate (dry...milk...dry...milk etc.). Scrape down the bowl and give it one final mix but don't mix too long. Pour the batter over the mango and syrup layer.


Bake at 350F for 35 to 45 minutes, or until a toothpick inserted in center of cake comes out clean (it takes 45 minutes in my electric oven). Remove from oven and let the cake cool in the pan for 15 minutes. Run a thin knife around the edge to loosen, then invert on a serving plate and peel off the parchment paper; serve warm. This cake is excellent with whipped cream or ice cream.

 
NOTE: Do not make this in a spring form pan because the sauce might leak out.

NOTE: You can make this with almost any kind of fruit, blueberries work nicely too.

NOTE: The fruit might appear quite wet when you first invert the cake, but as it cools off, the sauce thickens considerably.

Saturday, 26 May 2012

COOKIE BOWLS

Looking for a fun and inexpensive way to jazz up your next family gathering? Try these cookie bowls. Not only are they easy to do, but you can fill them with anything from pudding, to ice cream, to cheesecake. You can make the cookie bowls ahead of time and freeze them (unfilled); there are tons of possibilities.

The instructions for these cookie bowls called for forming them over an inverted cupcake pan, however, I wanted bigger (and thicker) ones because they were for a specific purpose and had to be strong enough to travel well, so I formed them over an inverted Texas size  muffin pan.

DO NOT BE TEMPTED TO MAKE THESE COOKIE BOWLS USING ALL BUTTER. IT WILL NOT WORK. THE DOUGH WILL SPREAD ALL OVER THE PLACE AND NOT FORM A BOWL !!!!!

1/4 cup butter flavored shortening (no substitutions)
1/4 cup butter (room temperature)(no substitutions)
1/3 cup white sugar
1/3 cup brown sugar
1 egg
1 teaspoon vanilla extract
1/2 teaspoon salt
1/4 teaspoon baking powder
1½ cups all purpose flour
1/4 cup miniature semisweet chocolate chips

Beat together shortening, butter and sugars in a large bowl; add the egg and vanilla; beat until well mixed.

Mix the flour and baking powder and gradually stir them into the batter; stir in the chocolate chips.

Put batter into a large plastic bag and flatten into a disk; chill for at least an hour. Preheat your oven to 375. Turn your cupcake (or muffin) pan upside down and cover every other one with foil.

NOTE: standard size cupcake pan requires a 4" circle of foil and the Texas size muffin pan requires a 6" circle of foil. Spray the foil with vegetable spray.
 NOTE: I used the new no stick foil and didn't have to spray it at all.

NOTE: If you are using a standard size cupcake pan, you can use full size paper cupcake liners instead of the foil.


Roll the chilled cookie dough  (between two pieces of waxed paper) out to about 1/8th inch or about the same as pie dough. Cut circles and drape over foil, smoothing wrinkles and/or cracks in the dough together and trimming to fit.


Bake 10-12 minutes or until light brown. Remove from oven and let them COOL ON THE PAN FOR 10 MINUTES BEFORE TRYING TO REMOVE THEM. After 10 minutes, gently lift them off of the pan (use the tip of a butter knife to lift one corner first) but DON'T REMOVE THE FOIL UNTIL THE COOKIE BOWL IS COMPLETELY COOLED. Fill just before serving.

Monday, 21 May 2012

MARINATED PORK LOIN

After grilling the same country style pork ribs  for the past umpteen years, I wanted a change.  I wanted to find some cut of pork that didn't need pre-cooking (in order to get it nice and tender). So recently, we started grilling pork loin (not tenderloin). The whole loin is very tender, flavorful and unlike the country style pork ribs that have lots of ... what picky-picky husband calls "waste" (fat, gristle, bone), the loins have ZERO "waste".  I usually buy a 2 pound loin and that is perfect for three big eaters (or 2 of us plus lunch tomorrow).

 
1/2 cup soy sauce
1/2 cup brown sugar
4 tablespoons pineapple juice
1 tablespoon dehydrated onion flakes
4 tablespoons canola oil
1/2 teaspoon ground ginger
1/2 teaspoon black pepper

Put everything in a large zip lock plastic bag and squeeze it around to mix well.

Slice your 2 pound pork loin into 3/4" thick slices and put them into the bag with the marinade, making sure the liquid reaches all of the meat surfaces.  Put the bag in the fridge for 6-12 hours (I did it for 6 hours and it was perfect).

When you are ready to grill, remove the meat from the marinade (but save the marinade). Bring the marinade to a very gentle boil and cook it for 15 minutes. This cooking time will make the marinade safe to eat AND it will thicken the marinade so you can use it to baste the pork loin on the grill.

Grill your pork outdoors, basting the meat each time you flip it over.

Friday, 18 May 2012

LEMON MERINGUE PIE FOR TWO

Whether you are empty nesters, like us, or you only have a couple of people to cook for; "recipes for two" are great!! Not only do they eliminate the temptation for 2nd third helpings, but they are excellent for those times when you don't feel like eating the same full size dessert all week!! This recipe makes two perfect (single serving size) lemon meringue pies, one of picky-picky husbands favorites.

CRUST
1/3 cup all purpose flour
1/8 teaspoon salt
1 tablespoon  cold shortening (I use butter flavored)
1 tablespoon cold butter
1/2 teaspoon white sugar
1 tablespoon cold water

Mix all of the dry ingredients in a small bowl; cut the cold shortening and butter into the dry ingredients until it is about "half of a pea" size. Stir in the cold water and mix into a ball (don't over work). Divide dough in half.

Any small oven proof dish will work for these little pies; I used my 10 ounce Pyrex custard cups.  Press the dough into the bottom and about half way up the sides of the custard cup. You can roll out the dough if you like, but I find it easier to just press the dough into place. Bake in preheated 425 oven for about 10 minutes or until light golden. Remove from oven and set aside.

LEMON FILLING
1/3 cup granulated sugar
1 tablespoon corn starch
1/8 teaspoon salt
1/2 cup cold water
1 egg yolk, lightly beaten with fork   (save the egg white)
2 tablespoons FRESH lemon juice
1 tablespoon butter

In a small, heavy bottom, saucepan, mix the sugar, cornstarch and salt; whisk in the cold water,  until it is smooth.  Cook (stirring) on medium heat until thick and bubbly, then reduce heat and cook (and stir) for 2 minutes.

Slowly drizzle about half of the hot mixture into the beaten egg yolk (whisking like crazy as you drizzle, so you don't get scrambled eggs). Once well whisked, put it all back into the saucepan and cook 2 more minutes at a gentle boil.

Remove from heat and add butter and lemon juice; mix thoroughly and pour into baked pie shells.

MERINGUE
1 egg white
1/8 teaspoon cream of tartar
2 tablespoons sugar
1/2 teaspoon vanilla extract

Using a GLASS bowl (never use plastic when whipping egg whites) and beaters that are totally free from any grease or oil; beat egg white and cream of tartar until you get soft peaks. Sprinkle in the vanilla and sugar (while the mixer is still running) and continue beating until you get stiff peaks.

Spread meringue onto hot filling. Put back into a preheated 350 oven for about 10-15 minutes or until the peaks of the meringue are golden.
After the meringue is cooked, let these little pies sit at room temperature for about an hour then chill them for at least 2 hours before serving. Once they are chilled, you can lift the pies out of their baking dish for a prettier presentation.

Wednesday, 16 May 2012

CLASSIC MACARONI SALAD

Everyone seems to have their own tried and true family macaroni or potato salad recipe. Some have lots of vinegar, some have lots of mustard, some have no eggs (yee gads!!) I even had some that had small cubes of sharp Cheddar cheese which was surprisingly tasty.

I remember when I was little, my folks took us back to visit our VERY German relatives in the Dakota's and one of my Aunts gave me some German potato salad. I was a huge fan of potato salad, but let me tell you that hers was not like any other potato salad I had ever tasted. It was not only FULL of vinegar and bacon grease, but it was HOT!! It's been over 50 years but I still can remember my shock!!  lol

What do you put in YOUR macaroni (potato) salad?


2 cups dry small seashell macaroni
½ cup chopped onion chopped (fairly fine)
3 stalks of celery with leaves chopped (fairly fine)
½ cup red bell pepper chopped (optional)
1 cup grated carrot
3 large pickles chopped (favorite flavor)
4 hard-boiled eggs chopped
½ teaspoon black pepper
1 cup lite mayonnaise
3 tablespoons yellow prepared mustard
3 tablespoons pickle juice

Boil macaroni for 8 minutes (or as recommended on box), then rinse under cold water, and drain very well.

NOTE: Many recipes warn you not to rinse cooked macaroni, however, I find that macaroni salad stays creamier if you rinse the starch off of the cooked macaroni before you add the mayonnaise to the salad.

Add chopped veggies, eggs and pickles to the cooked and rinsed macaroni. Whisk the mayonnaise, mustard, pepper and pickle juice together and gently stir into the macaroni-veggies.

IMPORTANT: This salad really needs to sit in the refrigerator overnight so the flavors can blend together…it makes a huge difference.

NOTE: I do not add salt to this salad because there is already a lot of salt in the pickles, pickle juice and mustard.

NOTE: Just before I put this salad into the fridge, for the first time, I put a piece of wax paper (or plastic wrap) on the surface of the salad and then I lay 2 paper towels (folded) on top of the wax paper and snap the Tupperware lid on. The paper towel will attract any condensation in the bowl and the waxed paper (or plastic wrap) will keep the moisture from running down into the salad. Once the salad is in the fridge overnight, discard the wax paper and paper towel.

NOTE: The amount of mayonnaise you use is up to you. Start with 1 cup and add more if you like your salad creamier.


Wednesday, 9 May 2012

INDIVIDUAL YORKSHIRE PUDDINGS

On VERY special occasions, my British mother used to make roast beef with Yorkshire pudding. She baked the pudding in a 9" x 9" pan and I can still picture the huge golden "puff" coming out of the oven. Of course, it always collapsed by the time she brought it to the table, but we all thought it was SUPPOSED to look like that and we eagerly dunked chunks of the tasty treat into mom's deliciously perfect beef gravy; Mmmmmm, I can still taste it.

Recently, I decided to make a couple of changes to my Yorkshire pudding recipe. First, I made them into individual puddings and secondly, I decided to serve them with roast chicken and gravy, so I added a little poultry seasoning and onion powder  into the batter; what a nostalgic treat!!

 This recipe is fool proof as long as you follow it closely.

The cooking times for these individual Yorkshire puddings work well if you bake them in one of those over-sized cupcake pans, I believe they are called Texas size muffin pans; a popover pan will work well also. If you use a standard cupcake pan, you'll have to reduce the cooking time.

Put your UNGREASED pan in a COLD oven and then preheat the oven and pan to 425.

While your oven/pan is preheating, whisk together:

3 eggs
¼ teaspoon salt
¼ teaspoon onion powder (not onion salt)
½ teaspoon poultry seasoning  (if you use chicken gravy)
1 cup of milk (see note)
1 tablespoon melted butter

NOTE: If I have whipping cream, I put about ¼ cup of whipping cream in a measuring cup and then fill the rest of the way with 2% milk...if I have no cream on hand, I just use 1 cup of 2% milk.

After the above ingredients are whisked together well, add one cup of all purpose flour (spoon flour into measuring measuring cup and level off with straight edge). Whisk everything together until it looks very smooth and creamy. Let batter sit at room temperature while your oven preheats.

Working quickly (so your pan doesn't cool off) take your pan out of the hot oven and spray each cup with vegetable spray. Put a small chunk of COLD butter (roughly ½ teaspoon but the exact size is not crucial) (see note below) into the bottom of each hot cup (don't wait for it to melt). Fill each cup half way full.

Bake at 425 for 20 minutes. After 20 minutes, turn the oven down to 325 (don't open the oven door) and bake for another 15 minutes. Remove puddings from pan and poke a tiny hole (I use a toothpick) in the bottom of each popover to relieve a little steam (not totally necessary if you are going to eat them right away).

The inside of the Yorkshire pudding is full of light batter with holes, which is perfect for holding butter and gravy.

NOTE: Traditionally, you are supposed to pour the batter over hot beef fat  in the bottom of each muffin cup, however, I couldn't bring myself to do that (and besides I was serving them with chicken), so I used butter and it works great.

NOTE: If you are serving these with roast beef, omit the poultry seasoning and add whatever seasoning you like.

NOTE: This recipe makes six generous Yorkshire puddings.

Wednesday, 2 May 2012

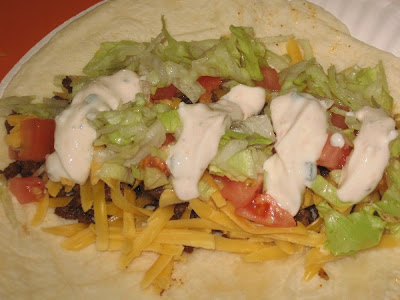
BAJA SAUCE (Taco Bell Clone)

Everyone is posting spicy and delicious recipes for Cinco de Mayo, so I thought I would post one of my favorite "go withs".  This cold, creamy and spicy condiment can be used on anything that you would use sour cream on; it is delicious on beef tacos, enchiladas, fish tacos, veggies and much more. Just make sure you let it sit in the fridge overnight before serving it. We call it Baja Sauce at our house.

¼ of a red bell pepper
1 jalapeno sliced (see note below)
2 tablespoons diced onion
Put the above ingredients in a food processor, and chop until very fine.

Mix 6 teaspoons of the above chopped mixture with:
½ cup mayonnaise
½ cup sour cream
1 tablespoon vinegar
¼ teaspoon black pepper
¼ teaspoon garlic powder
¼ teaspoon ground cumin

Mix well and cover. Chill overnight.
NOTE:  I use a very small jalapeno and remove the seeds and ribs  to lessen the heat factor for picky-picky husband, but if you like more "heat", use a larger pepper or leave some of the seeds  in.

NOTE: I've never tried Miracle Whip in this recipe, so I can't comment on that. I used light mayonnaise and light sour cream and it worked very well.

NOTE: This keeps in the fridge for several days.