Showing posts with label CLONE RECIPES. Show all posts

Thursday, 3 July 2014

SWEET BABY RAYS BARBECUE SAUCE CLONE

We love thick and sweet barbecue sauce, and our favorite (for years) has been Sweet Baby Ray's brand.  Recently, I did an panic-internet search for something similar to SBR barbecue sauce because I had one of those "I forgot my grocery list on the kitchen counter again" days at the market and dinner was planned around grilling.

Well, I found this recipe on a ton of web sites, all crediting www.halfbakedharvest.com, so I thought I would give it a try and we were thrilled with the results.  I hope you like it too.


Bacon wrapped Shrimp coated with
BBQ Sauce and Baked
 
 
1  1/4 cups regular ketchup
1  cup dark brown sugar (gives much better flavor than light brown)
1/4  cup molasses
1/4  cup pineapple juice
2  teaspoons hickory liquid smoke
2  1/2 teaspoons ground dry mustard
2 teaspoons paprika
1/2  teaspoon garlic powder (not salt)
pinch of cayenne pepper
1  1/2 teaspoons kosher salt (not fine table salt)
1 teaspoon black pepper

Put everything into a saucepan and whisk it together. Bring to a boil, then reduce heat to slow simmer and simmer 5 to 15 minutes, depending on how thick you want it to be.

You can use this immediately or store in fridge for a week or so or portion it out and freeze it for future use. 

NOTE: If you don't have kosher salt, you can use regular table salt, just use LESS, since kosher salt and table salt measure very differently.


 Happy Grilling!!

Monday, 6 January 2014

LIPTON ONION SOUP MIX CLONE

How many times have you set out to put your favorite ingredients into the crockpot, only to realize you do not have Lipton Onion Soup Mix?

Well, this clone recipe is coming to the rescue. It tastes just like boxed Liptons Onion Soup mix (I think it is MUCH better because it has such a FULL flavor). It is quick to make out of pantry staples; it has no soy; it's gluten free; no MSG; you can use low sodium bullion if you want; you can pronounce ALL of the ingredients, and it is VERY BUDGET FRIENDLY!!

I am NEVER buying boxed
Lipton Onion Soup mix again!!

 
This clone recipe is GREAT for dips, pot roast, meat loaf, or anything you would normally use the onion soup mix for.
 
4 tablespoons DRY instant minced onion (toasted)
2 tablespoons LOW SODIUM beef bullion granules
1/4 teaspoon onion powder (not onion salt)
1/4 teaspoon DRY parsley flakes
1/8 teaspoon celery seed CRUSHED (important ingredient)
1/8 teaspoon paprika
1/8 teaspoon black pepper
 
Equals a  single 1 1/4 oz.
envelope of soup mix.
 
NOTES: It is not necessary, but I toast the DRY instant minced onion in a hot DRY pan for a few minutes (watch it closely). When it turns golden, remove from the pan immediately or it will continue to get darker. Toast them so they are this color:
 
 
NOTES: Make sure you crush the celery seed (and don't leave it out). A mortar and pestle work well for this.


NOTES: If you use the GRANULAR TYPE beef bullion (and you are going to make a sour cream type dip) you'll have to mix everything together and let it sit in the fridge for 20 minutes or so........so the bullion granules can dissolve. After 20 minutes, just stir and the granules will disappear.
 
NOTES: This sounds like a LOT of onion, but it is just right!!


Monday, 19 August 2013

KETCHUP

In your busy, hectic and over-accounted-for day; making homemade ketchup is probably not a big priority ...........I get that. But if you find yourself with a little extra time, this ketchup is WELL WORTH the minimal effort it takes to whip it up. It is not only inexpensive to make (uses every day pantry staples), but it is sweetened with honey, so it is REALLY-REALLY tasty!!


6 ounce can of tomato paste
1/4  cup honey
1/2  cup white vinegar
1/4  cup water
3/4  teaspoon salt
1/4  teaspoon onion powder
1/8  teaspoon garlic powder (not garlic salt)

Whisk everything together until smooth and then bring to a boil. Turn the heat down and simmer slowly for 20 minutes (whisking every five minutes or so).

Cool and store covered in refrigerator. This recipe makes just over a cup of ketchup, but you could easily double or triple the recipe with no other adjustments.

NOTE: In my humble opinion, this ketchup is just perfect, but if you like your ketchup with a little "heat" to it, just add some cayenne before cooking.

Monday, 12 August 2013

HOME MADE CREME FRAICHE

Creme Fraiche is all the rage on the Food Network cooking channels, but it is one of those ingredients that I've been too stubborn old fashioned to try, until now.

Well, my curiosity got the better of me and creme fraiche went onto my grocery list. You can imagine my shock when I saw the price of it (at least at our market) was $7+ per cup!!! That's just crazy.

So in my penny pinching thrifty mindset,(and wanting to know what all the creme fraiche hubbub was about), I set out to see if I could MAKE it. I was shocked at how easy, cheap (and fun) it is to do.  Yes, it takes a couple days to make, but 99.999% of that time is just waiting for it to "cure".


2 cups of heavy whipping cream (at least 45% butterfat)
3 tablespoons buttermilk (OR) plain yogurt (see note)

That's it!!

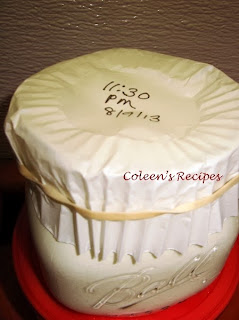
Mix the two ingredients together well, and put it into a very clean glass jar. Cover it loosely and let it sit on your kitchen counter for 24 hours (room temperature should be 70° to 75°).
It's good if you give it a quick stir after 8 hours, but that isn't absolutely necessary.

After 24 hours, it will still seem a little thin, but that's OK. Put a lid on the jar and put it in the fridge for another 24 hours. After 24 hours in the fridge, it will thicken up and be ready to use in any recipe that you would normally use sour cream for.

 
The flavor will be very mild at this stage, but it will get tangier the longer it sits in the fridge (keeps about 7 to 10 days).

People say it is the "mild cousin" to America's commercial sour cream, but I think it is much tastier than that. Of course, the flavor of your creme fraiche will depend on the "flavor" (quality) of whipping cream, and brand (quality) of buttermilk.

Creme fraiche is excellent for baking sweet AND savory dishes. It is much more tolerant to heat (than commercial sour cream), so it works well in gravy or sauces and makes killer mashed potatoes!! Sweetened, it is nice over any dessert, especially fresh fruit. Can you tell that I am a recent convert??


NOTE: Many of the recipes for creme fraiche (that are online) insist on using UN-pasteurized cream, but I couldn't find it, so I just used regular pasteurized heavy whipping cream and it worked fine.

NOTE: The buttermilk or yogurt that you use HAS to have live cultures in it. The buttermilk at our market was low fat and didn't mention "live cultures", so I opted for the same amount of organic unflavored yogurt with live cultures and it worked very well.


Monday, 19 November 2012

HOME MADE PANKO CRUMBS

Panko (breading) crumbs are the absolute best for many, many recipes. I recently used them to turn "ho-hum" shrimp into "Wow, these are GREAT" shrimp.  I've heard of people using Panko in meatloaf and meatballs (I haven't tried that yet) as well as a ton of other recipes.

My biggest problem with panko bread crumbs is that they can be expensive AND they are NOT something I routinely keep in my pantry.  That's why I was thrilled to make this discovery!!

Panko bread crumbs are different from standard bread crumbs because they are a made from SHREDDED bread, not bread crumbs.  With that in mind, I FROZE 4 slices of regular (cheap) sandwich bread. I  then cut the crusts off and cut the resulting "squares" of sandwich bread in half.  I then stacked them up and fed them through the SHREDDER in my food processor.  This is what they looked like:

 
They were light and fluffy, just like
commercial Panko crumbs!!

I then sprinkled them evenly over a dry cookie sheet, gently spreading them as thin as I could and baked them in a pre-heated  300° oven for about 10 minutes.  Actually, they were dry in 8 minutes, but I let them stay in their for a couple more minutes to be sure.  Just don't let them turn color.

This "recipe" will make about 1½ cups of crumbs, so if you double the recipe, make sure you bake it on two cookie sheets so the crumbs can spread out and dry properly.
 
 
I'm thinking of making whole wheat panko crumbs next!!

Saturday, 21 July 2012

PAUL PRUDHOMME SEASONING MIX CLONE

I've thought about trying commercial dry rubs for a long time, but I have trouble spending several dollars on them since the ingredient list tells me I have those same spices at home!! So...... I've been experimenting with my own spice rack (with picky-picky husband's timid pallet in mind of course). He is (has always been) a meat and potatoes...salt and pepper...mild barbecue sauce kind of guy, so I've had to introduce these dry spice rubs "subtly" (snicker).

Today's post was a big hit. I found it during one of my "2 AM can't sleep" Internet sessions and I failed to write down it's source, I apologize. The spice combo is just right for our taste..... not too spicy, but VERY flavorful and it goes well with just about any meat, even seafood.


PAUL PRUDHOMME (style) SEASONING MIX

1 tablespoon salt
1 tablespoon paprika
1½ teaspoons garlic powder
1 teaspoon onion powder
1 teaspoon white pepper
1 teaspoon DRY mustard powder
½ teaspoon ground cumin
½ teaspoon ground turmeric
¼ teaspoon ground nutmeg

Mix everything (makes about 1/4 cup) and rub, liberally, onto raw meat about an hour before grilling.

Monday, 4 June 2012

BISQUICK CLONE RECIPE

I found a recipe, recently, that I really wanted to try, however, it called for 1 cup of commercial Bisquick, an item I don't usually stock in my pantry.  I wasn't too keen on buying a whole box of Bisquick (when I only needed a cup of it) so I went Internet surfing for a Bisquick clone recipe.

I found several but they all called for shortening (not exactly what I was looking for). Then I found the following recipe, which uses Canola oil (on http://www.food.com/ )  I used it to make biscuits for dinner tonight and we were VERY pleased with the light, flaky results. They were very similar to commercial Bisquick biscuits (picky-picky husband said the were much better than Bisquick) and you can NOT beat the convenience!! I intend to keep a canister of this mix in my pantry from now on.

This recipe can easily be doubled or tripled and I love that the ingredients are always on hand.

BISQUICK CLONE MIX

4½ cups all purpose flour
4 tablespoons baking powder
2 tablespoons sugar
1 teaspoon salt
10 tablespoons Canola oil

Whisk everything together (I used my stand mixer with the whisk attachment) but a hand whisk would work just as well, it will look like this.

Store this mixture in a container with a tight fitting lid (at room temperature) for up to 6 weeks. Use it exactly like you would for ANY recipe that calls for Bisquick (biscuits, muffins, pancakes, pot pie crusts, etc.). It not only saves a lot of money, but it tastes great too!!
BISCUITS (makes 6)

2¼ cups Bisquick Clone Mix
2/3 cup milk

Mix with a spoon until it comes together, then turn out onto your counter that has been dusted with a little more of the dry mix (don't use flour). Knead lightly 10 times, then pat to 1/2" thick. Cut with 2½" biscuit cutter. Place on greased cookie sheet (I use parchment) and brush with melted butter. The melted butter is optional, but we like them that way.

Bake at 450 for 10-12 minutes (my electric oven took 12 minutes).
I found a neat Bisquick recipe site that has lots of interesting recipes: CLICK HERE

Thursday, 31 May 2012

MANWICH CLONE RECIPE

Someone recently told me that a variety of convenience foods (that we all take for granted) are not readily available to cooks living outside of the USA; simple things like good old hot dogs, graham crackers, ranch mix, canned pumpkin, Crisco and  Manwich ( plus MANY others).

I don't buy many convenience foods, but every once in a while, I  find something like Manwich comes to the "quick snack for the grandkids" rescue. The down side is that it can be expensive when feeding a crowd, so I was very happy to find this great "clone" recipe. 

TIP:  When feeding a crowd,  I usually serve these sandwiches, "slider style", on small dinner rolls.

8 ounces tomato sauce
1 cup ketchup
1 tablespoon dried onion flakes
1 tablespoon finely diced green pepper
1 teaspoon salt
1 teaspoon sugar
1 teaspoon prepared mustard
1 teaspoon chili powder
1/2 teaspoon dried minced garlic
1/4 teaspoon celery seed

Mix everything together and add to one pound of (browned and well drained) ground beef.  Simmer for 10 minutes then spoon onto  buns and serve.

Wednesday, 2 May 2012

BAJA SAUCE (Taco Bell Clone)

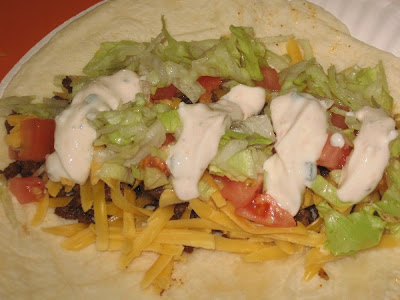
Everyone is posting spicy and delicious recipes for Cinco de Mayo, so I thought I would post one of my favorite "go withs".  This cold, creamy and spicy condiment can be used on anything that you would use sour cream on; it is delicious on beef tacos, enchiladas, fish tacos, veggies and much more. Just make sure you let it sit in the fridge overnight before serving it. We call it Baja Sauce at our house.

¼ of a red bell pepper
1 jalapeno sliced (see note below)
2 tablespoons diced onion
Put the above ingredients in a food processor, and chop until very fine.

Mix 6 teaspoons of the above chopped mixture with:
½ cup mayonnaise
½ cup sour cream
1 tablespoon vinegar
¼ teaspoon black pepper
¼ teaspoon garlic powder
¼ teaspoon ground cumin

Mix well and cover. Chill overnight.
NOTE:  I use a very small jalapeno and remove the seeds and ribs  to lessen the heat factor for picky-picky husband, but if you like more "heat", use a larger pepper or leave some of the seeds  in.

NOTE: I've never tried Miracle Whip in this recipe, so I can't comment on that. I used light mayonnaise and light sour cream and it worked very well.

NOTE: This keeps in the fridge for several days.

Wednesday, 9 March 2011

SUBWAY SWEET ONION CHICKEN TERIYAKI SANDWICH

This is a "knock off" recipe for Subway's sweet onion chicken teriyaki sandwich. It is delicious, only about 370 calories and very quick to fix (as long as you make the sweet onion sauce a day ahead).


 1 pound boneless, skinless chicken tenderloins
.¼ cup soy sauce
¾ cup pineapple juice
½ teaspoon garlic powder
½ teaspoon ground ginger
½ teaspoon dry mustard
¼ teaspoon white pepper
¼ cup brown sugar
2 tablespoons honey
.
Bring everything but the chicken to a boil and simmer for about 5 minutes or until it starts to reduce. Cool completely and pour over the chicken, cover and refrigerate the chicken for about 30-60 minutes.
.
When it's time to eat, take the chicken out of the marinade (throw marinade away) and grill or broil the chicken until done (don't over cook).
.
Place chicken pieces in grilled bun and add favorite toppings. Drizzle with sweet onion sauce. Mmmmmmmmmmm!!! Makes about 6 sandwiches.


SUBWAY SWEET ONION SAUCE This is SO tasty and I find all sorts of uses for it. It is not overly onion-y and not overly sweet. Make it a day ahead of time to let the flavors blend and mellow.

½ cup light corn syrup
1 tablespoon finely minced Vidalia onion
1 tablespoon red wine vinegar
2 teaspoons white distilled vinegar
1 teaspoon balsamic vinegar
1 teaspoon brown sugar
1 teaspoon buttermilk powder
¼ teaspoon lemon juice
1/8 teaspoon poppy seeds
1/8 teaspoon salt
pinch cracked black pepper
pinch garlic powder
.
Combine all ingredients and bring to a boil for about 30 seconds. Whisk well and cover and chill overnight.

NOTE: If you don't have Vidalia onion, a white onion will work, just mince it VERY finely. I've even used re-hydrated onion flakes successfully, although the vidalia onion is best.

Tuesday, 11 January 2011

TACO BELL RED SAUCE CLONE RECIPE

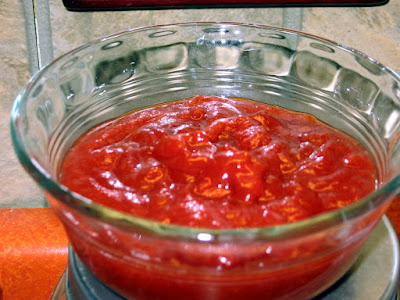
I admit it, there are certain items that I really enjoy at Taco Bell. Yes, I know it's not authentic Mexican food, but when you like something, well, you overlook things like that. One thing I enjoy at TB is a warm condiment called red sauce. It is not the hot sauce that comes in a packet; it is the steaming hot red sauce that is served on their tostados and their Mexican pizza. This recipe is about as close to the original taste as you can get!!!


 1 (8 ounce) can of tomato sauce
1/3 cup water
¼ teaspoon chili powder
1½ teaspoon ground cumin
1½ teaspoons dry onion flakes
1 tablespoon white vinegar
½ teaspoon garlic powder
½ teaspoon garlic salt
¼ teaspoon paprika
¼ teaspoon white sugar
¼ teaspoon cayenne pepper

Mix everything and simmer (on very low) for 15-20 minutes. Serve hot. The "spice level" is very moderate if you use it right away. It is a little spicier if you let it sit in the fridge overnight.
Serve (as a hot condiment) with any Mexican food.


NOTE: I was surprised to see that there is vinegar in this sauce (you can't taste it in the final product).
NOTE: I don't usually buy garlic salt. I just mix it up with 3 parts salt to 1 part garlic powder, stir well.


Tuesday, 16 November 2010

HEINZ CHILI SAUCE CLONE

This is a clone recipe for Heinz chili sauce. It is so easy...takes every day ingredients and is even tastier than the original!! Chili sauce was never a pantry staple for me; I always found it on my shopping list for holiday and special occasion recipes, like this shrimp cocktail (which calls for Heinz chili sauce). I will never buy commercial chili sauce again because this is so much better (and cheaper)!!!


1 cup of tomato sauce
1/3 cup light corn syrup
1/4 cup white vinegar
2 teaspoons dry onion flakes
2 teaspoons granulated sugar
1 teaspoon salt
1 teaspoon lemon juice
1/8 teaspoon garlic powder

Whisk everything together and bring to a boil in a small saucepan with a heavy bottom. Turn heat down to a low simmer and cook for 25-30 minutes, depending on how fast you are simmering it (mine was done in 25 minutes). Watch it towards the end so it doesn't scorch.
Cool to room temperature, then cover and chill.
It will get nice and thick like this.

NOTE: I made this recipe, exactly as it is stated above, I don't know how it would effect the final results if you use fresh onions.

Friday, 14 August 2009

GLAZED SPUDNUT (style) DONUTS

For those people who are old enough to know what a Spudnut is...this recipe will be a treat. For those of you too young to remember Spudnuts...let's just say that they were the best donut in the universe. I heard that there are still a few Spudnut shops around, but it appears that they are few and far between.

This recipe (from the Idaho Potato Commission) makes a LOT of Spudnut-style donuts (about 4 dozen) so you might want to half the recipe if you decide to make them. If you are not experienced with yeast doughs, I don't recommend trying this recipe, however, if you have had even moderate success with yeast doughs, I hope you give the recipe a try (it is not a hard recipe at all).

The donuts are very moist, sweet and have just a HINT of lemon. My hubby is a donut (and Spudnut) connoisseur from way back, and he gave these donuts two thumbs up!!

 
 2 pkgs. dry yeast
1/2 cup warm water
1 cup sugar
3/4 cup shortening (do not use butter)
1 & 1/2 cups cold instant mashed potatoes
3 eggs well beaten
2 cups scalded milk (cooled to luke warm)
1 tablespoon salt
1 tablespoon lemon extract
6 to 8 cups all purpose flour

Dissolve the yeast in the warm water and set aside. Cream the sugar and shortening and beat in the cold potatoes, eggs, cooled milk, yeast water, salt and lemon extract. Gradually add the flour to make a soft dough, knead well. The dough will be quite sticky, but holds together well. It should be a softer dough than bread dough.


 Cover dough with plastic and let it raise in a warm place until doubled in size (this takes a huge bowl and about an hour). After an hour, pull dough out of bowl and onto the counter. Sprinkle with flour and knead it a little to get most of the air out of it. If dough seems really sticky, just flour your board. Roll the dough out to a half inch thickness. Cut with well-floured cutter.


Spray a piece of parchment paper (or waxed paper) with a little vegetable spray and then wipe it down with a paper towel. Cut the paper into squares and put a cut out donut on each square. This will help you when it is time to transfer the raised donuts from the counter to the hot oil (see notes).


 Let the doughnuts raise until they get nice and puffy, then
deep fry the donuts in 375 degree vegetable oil until they are deep golden (mine took about 2 minutes a side). Only fry two or three donuts at a time.
Drain on paper towels. Glaze while still warm


CLICK ON THIS PHOTO FOR BREAKFAST
GLAZE
1 pound of sifted powdered sugar
1 tablespoon of vanilla extract
Whisk in enough boiling water to make a thin glaze, drizzle over donuts.


And don't forget the donut holes!!!


NOTE: Recipe calls for shortening, I used butter flavored Crisco.
NOTE: Recipe calls for prepared instant potatoes. I prepared my potatoes per the box instructions including water, milk, butter and salt.
NOTE: Recipe calls for a tablespoon of lemon extract. That sounds like a lot, but it leaves just a tiny HINT of lemon flavor in the final product.
NOTE: Recipe calls for 6-8 cups of flour. I used all 8 cups and it was no where near as "solid" as bread dough, so expect a sticky dough.
NOTE: I let my donuts raise on squares of sprayed parchment paper. If you do that, then you can pick up the donut without deforming or deflating it and gently turn it over in your hand and gently peel off the paper before you ease the donut into the hot oil.
NOTE: I have a 2" donut cutter, but it just seemed to make a very tiny donut, so I cut the bottom and top out of a pineapple can and used that as my cutter. I cut out the center of the donut with a tiny cookie cutter.
NOTE: I used my smallest electric frying pan with 3" of vegetable oil to fry these donuts. The electric fry pan allows you to easily adjust the oil to 375 degrees and since you should only fry two or three donuts at a time, the smaller electric fry pan makes sense.