Wednesday 17 September 2014

GRANDMA's BREAD AND BUTTER PICKLES

When I was a little girl I watched my (very German) Aunt Welentina Ezlinger make pickles in her basement. I climbed up on a stool and watched her line up the hot jars and put "seeds" in each one. She then packed the jars tight with cucumbers from her garden and poured a hot vinegar liquid over them. That was almost 60 years ago, but I remember it like it was yesterday. I was so impressed!! I think of her when I make this recipe.

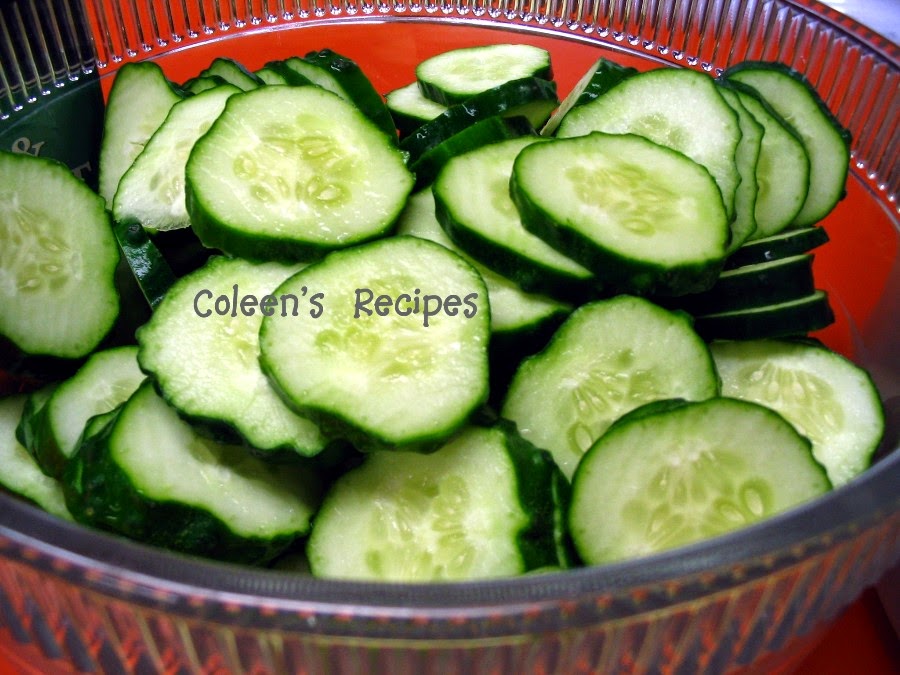
We love these bread and butter pickles!! They are fresh and bright tasting and are worlds better than commercial pickles!!


GRANDMA's BREAD AND BUTTER PICKLES        6 PINTS
 
4 cups water
1/4  cup pickling salt (not regular salt)
10 large pickling cucumbers
ice cubes (I use 2 trays of ice cubes)
3 cups sugar
2 cups water
2 cups apple cider vinegar
2 teaspoons ground turmeric
2 teaspoons mustard seed
1/2 teaspoon celery seed
 
Wash the pickling cucumbers and slice them into 1/8" slices (I cut mine just a tad thicker than 1/8").
 
 
In a LARGE bowl, mix 4 cups water and 1/4 cup pickling salt until well dissolved. Add cucumbers and ice cubes and gently swirl, making sure the slices are all submerged.  Let cucumber slices soak for two hours.
 
After 2 hours, drain the cucumbers (throw away the liquid) and rinse completely with fresh water (I rinse mine 2 or 3 times).
 
In a large/deep pan, mix 3 cups sugar, 2 cups water, 2 cups apple cider vinegar, 2 teaspoons ground turmeric, 2 teaspoons mustard seed and 1/2 teaspoon celery seed. Bring this mixture to a boil.
 
Reduce heat to LOW and put the cucumber slices in. Stir gently and let the cucumber sit in the hot liquid until they are all hot (but not cooked). Don't let the cucumbers boil.
 
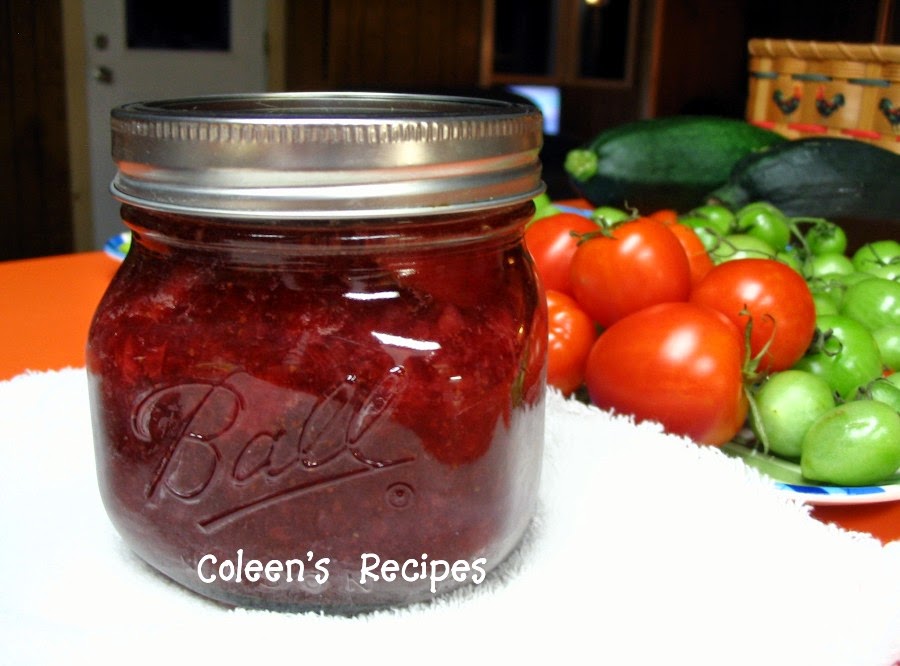
Remove the slices from the hot liquid (with tongs) and pack directly into sterilized PINT size mason jars (pack as many as you can get into the jars...pack tightly).
 
When the jars are all packed with cucumber slices, bring the pot of vinegar liquid back to a boil. Remove from the heat and pour into the jars of cucumber slices, to within 1/4" of the top. Run a CLEAN knife around the sides of the jars to remove any air bubbles.
 
Wipe off the rims of the jars with a clean moist towel and screw on the two piece lids.
 
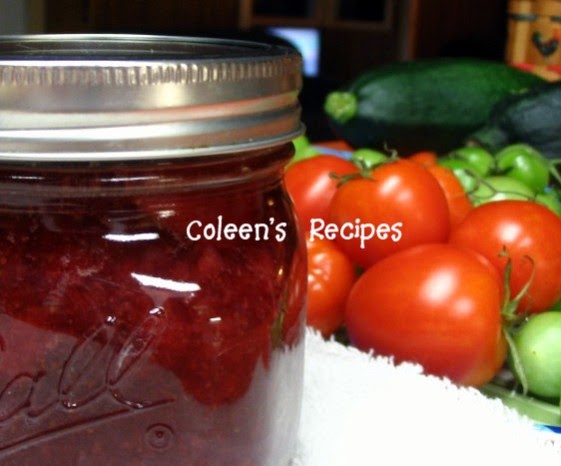
If you are going to use these pickles within 2-3 months, you can just keep them in the fridge at this stage.  If you want to keep them for a lot longer or if you want to store them in the pantry, you'll have to process the PINTS immediately in a hot water bath for 10 minutes.
 
Whether you keep them in the fridge, or put them through a hot water bath, you will have to let the cucumbers "pickle" for 2 or 3 weeks before you eat them, gently "shaking" the jars once a day.


ENJOY !!


Sunday 14 September 2014

SOFT COCONUT DROP COOKIES

These cookies are WONDERFULLY SOFT, rich, flavorful and easy to make. The recipe makes about 3 dozen big 4" cookies and if you store them in an airtight container, they will stay soft and chewy (they are totally addicting!!)

 
Soft Coconut Drop Cookies are PERFECT lunch box cookies, bake sale cookies, potluck cookies or "anytime cookies". They are delicious.

1 cup butter flavored shortening
1 cup sugar
1 cup brown sugar
2 eggs
1 teaspoon vanilla extract
2 cups flour
2 cups old fashioned oats
1 teaspoon baking powder
1 teaspoon baking soda
1/2 teaspoon salt
2 cups sweetened flaked coconut (lightly packed)
1 cup finely chopped pecans (optional)

Cream the shortening, sugars and vanilla until light and fluffy. Add eggs one at a time, beating in between each egg.

Add the flour, oats, baking powder, baking soda, coconut and nuts (if you are using nuts) and beat until well mixed (batter will be thick).

Take a well rounded tablespoon of cookie dough batter and roll it into a ball. Place on a greased cookie sheet spaced 3" apart (I use parchment paper instead of greasing the pan). Bake at 350° for 11-14 minutes (my electric oven takes a full 14 minutes). Leave the cookies on the cookie sheet a minute or two before you remove them.

After they are cooled, store the cookies in an airtight container.

 
ENJOY !!
 
Note: Recipe calls for butter flavored shortening (I use butter flavored Crisco). I'm sure they could be made with butter instead, but they will bake differently and probably spread out a lot more. I also don't think they would stay soft and chewy.


Wednesday 10 September 2014

TOMATO VEGGIE SOUP

We have already had frost a few times this fall and the yellow leaves are starting to fall; that means its SOUP time!! This recipe is a wonderful use for all of those extra garden veggies you have this time of year. Tomatoes, zucchini, carrots, onions, celery and anything else you can think of to add to the soup; this recipe is very versatile (and yummy).


1 cup chopped onions
1 cup chopped celery
1 cup chopped carrots
2 teaspoons minced garlic
2 1/2 cups water
2 large tomatoes (I used a ton of cherry tomatoes)
1 (15 ounce) can ro-tel tomatoes with juice (I use mild)
4 cups beef broth  (not bullion)
1/3 cup uncooked barley
1/4-1/2 teaspoon black pepper (I like 1/2 teaspoon)
2 cups chopped zucchini
1 can rinsed and drained kidney beans (or your favorite bean)
pinch of red pepper flakes if you like heat (optional)

Spray a large soup pot with vegetable spray and sauté the onions, celery and carrots until the onions turn soft and a little sweet.

Put the undrained can of rotel tomatoes


PLUS the two fresh tomatoes into the food processor and blend until smooth, then add to the pot.

Add everything else to the pot and simmer SLOWLY for 45 minutes, that's it; just stir it once in a while.

I'm SURE this could be easily done in the crockpot as well.


ENJOY !!

Saturday 6 September 2014

EASY OVEN BROWN RICE

We've been trying to eat healthier lately, and "nutrition empty" white rice has been replaced by brown rice at our house.

Before now, I have only had moderate luck making brown rice. Not only do you have to babysit brown rice on a burner for 40-ish minutes, but the end result can be a little crunchy, (or worse yet), it can be gummy and sticky. Then, of course, there is the dreaded layer of rice that always cements itself to the  bottom of the pan (insert frown here).... not fun!!

Well, my cooking friends, your brown rice "issues" are over!! This super easy method will give you fluffy brown rice every time (with every grain cooked) and NOTHING sticks to the pan....super easy!!


This recipe makes three cups of cooked rice, which is a lot of rice for smaller families. So, I divide the leftovers into 1/2 cup or 1 cup portions and I freeze it. This way you can have brown rice ready in a flash for a weeknight meal (or to add to soups, etc.)

1 1/2 cups brown rice
2 1/2 cups boiling water
1 tablespoon unsalted butter 
1 teaspoon kosher salt (optional)

Preheat your oven to 375° and spray an 8" x 8" baking dish with vegetable spray.

Put the dry rice in the prepared baking pan.  Heat the water, butter and salt until it just comes to a boil, then pour over the rice and stir everything just enough to get the rice to an even level in the pan. Then cover the pan with aluminum foil.

COVER PAN TIGHTLY

I use heavy duty aluminum foil and crimp the edges tight on all four sides. It is important that you trap the steam in the pan.

Bake at 375° for one hour. After an hour, remove the pan from the oven and take off the foil. Fluff the rice with a fork and that's it!!


If you aren't going to eat the rice as soon as it comes out of the oven, make sure you still remove the foil so that the condensation doesn't drip back into the rice.

ENJOY !!

Wednesday 3 September 2014

PERFECT BLUEBERRY CREAM MUFFINS


This muffin is sweet, moist, light, full of flavor and pretty to look at (I love muffins than have nice rounded tops). They are very quick and easy to make and they freeze well; what more can you ask for?

 
BLUEBERRY CREAM MUFFINS       MAKES 24

3 large eggs
1 + 1/2 cups sugar
3/4 cup vegetable oil
1 teaspoon vanilla extract
3 cups flour
3/4 teaspoon salt
3/4 teaspoon baking soda
1 + 1/2 cups sour cream
1 + 1/2 cups blueberries

In large bowl, beat the eggs and sugar until well combined. Leave mixer running and drizzle in the vegetable oil, stir in vanilla.

In another bowl, mix the flour, salt and baking soda. Add this dry mixture (to the egg mixture)alternately with the sour cream (I added it in thirds).

Gently fold in the blueberries.  Line cupcake pans with paper liners and fill about 3/4 full (I use an ice cream scoop). 

Bake in preheated 400° oven for 20 minutes (my electric oven takes 23 minutes).

* Adapted version of recipe found on Allrecipes.com

Wednesday 27 August 2014

TRIPLE CHOCOLATE ZUCCHINI BREAD

Do you have a lot of zucchini this summer? If so, this is a great way to use it. This treat is super chocolate-y, super moist (in fact it gets even more moist on day two), super easy to make and freezes very well.


(2) one ounce squares of unsweetened chocolate (melted)
3 large eggs
3/4 cup brown sugar
3/4 cup white sugar
1 cup vegetable oil (I used canola)
2 cups shredded zucchini (squeezed dry then measured)
2 teaspoons vanilla
2 + 1/2 cups flour
1 teaspoon baking soda
1/2 teaspoon baking powder
1 teaspoon cinnamon
1 teaspoon salt
1/2 cup unsweetened cocoa
3/4 cup semisweet chocolate chips

Things to do first:
1. Preheat your oven to 350°
2. Toss the chocolate chips into the measured flour to get them well coated,that way they won't sink to the bottom of the bread as it cooks.
3. Grease two large (9" x 5") loaf pans. I lined mine with parchment and then greased the parchment (this bread tries to stick to the pan if you go light on this step, but with the parchment paper, the zucchini bread tips right out.


4. Shred the zucchini then squeeze some of the water out of it (with your hands) before you measure it.

Directions:

In large mixing bowl (I used my stand mixer), combine eggs, sugar, oil, grated zucchini, vanilla and melted chocolate. Mix until smooth.

Next, add flour (that you've stirred the chocolate chips into), cocoa, baking powder, baking soda, cinnamon and salt. Mix until well combined, smooth and shiny (just takes a 30 seconds or so).

Pour batter into 2 well greased large loaf pans and bake at 350­° for 60 to 70 minutes (my electric oven takes exactly 60 minutes) or until a toothpick inserted into tallest part of the bread comes out clean. Don't over cook.

Cool in pans on a rack for 15 minutes, then remove from pans. Wrap the bread in plastic wrap while they are still hot.  This keeps a lot of the moisture inside of the zucchini bread as it cools.  Don't slice the bread until it cools down completely.


If you are going to freeze them, cool completely, then double wrap them or wrap them in plastic wrap and put in a Ziploc freezer bag.

FUN TIP: If your children are picky eaters, just peel the zucchini before you shred them, that way you won't hear "Mom, what are these green specs?" They won't even know that the zucchini is in there!!


ENJOY !!

Tuesday 19 August 2014

BEST EVER STRAWBERRY TOPPING

This topping rates 5 out of 5 stars for an ice cream topping, but it is also DELICIOUS over pancakes, pound cake, cheesecake and right out of the jar with a big spoon!! It is nice and thick and bright red (not a hint of watery-ness........is that a word?) 

It is economic to make for a large crowd and it keeps well in the fridge for a couple of weeks.

Only TWO ingredients!!
 
 
2 pounds of frozen strawberries
1 cup of sugar
 
I buy large bags of bulk frozen strawberries from our local discount store. I let them thaw for about 1/2 hour or so, then I pulse them in the food processor several times until you get a fairly small dice.
 
Add 1 cup of sugar, stir and put it in a heavy bottom kettle (heavy bottom kettles help it cook but not scorch). Cook on medium high heat until you get a good boil going, then turn down the heat to a medium low boil and cook for 20 minutes, stirring every few minutes.
 
After 20 minutes, remove from heat and skim off any pink foam. That's it!!  Chill in the fridge before using. Makes 4 cups of topping.
 
 
ENJOY !!