Showing posts with label BAKE SALE RECIPES. Show all posts

Sunday 14 September 2014

SOFT COCONUT DROP COOKIES

These cookies are WONDERFULLY SOFT, rich, flavorful and easy to make. The recipe makes about 3 dozen big 4" cookies and if you store them in an airtight container, they will stay soft and chewy (they are totally addicting!!)

 
Soft Coconut Drop Cookies are PERFECT lunch box cookies, bake sale cookies, potluck cookies or "anytime cookies". They are delicious.

1 cup butter flavored shortening
1 cup sugar
1 cup brown sugar
2 eggs
1 teaspoon vanilla extract
2 cups flour
2 cups old fashioned oats
1 teaspoon baking powder
1 teaspoon baking soda
1/2 teaspoon salt
2 cups sweetened flaked coconut (lightly packed)
1 cup finely chopped pecans (optional)

Cream the shortening, sugars and vanilla until light and fluffy. Add eggs one at a time, beating in between each egg.

Add the flour, oats, baking powder, baking soda, coconut and nuts (if you are using nuts) and beat until well mixed (batter will be thick).

Take a well rounded tablespoon of cookie dough batter and roll it into a ball. Place on a greased cookie sheet spaced 3" apart (I use parchment paper instead of greasing the pan). Bake at 350° for 11-14 minutes (my electric oven takes a full 14 minutes). Leave the cookies on the cookie sheet a minute or two before you remove them.

After they are cooled, store the cookies in an airtight container.

 
ENJOY !!
 
Note: Recipe calls for butter flavored shortening (I use butter flavored Crisco). I'm sure they could be made with butter instead, but they will bake differently and probably spread out a lot more. I also don't think they would stay soft and chewy.


Wednesday 3 September 2014

PERFECT BLUEBERRY CREAM MUFFINS


This muffin is sweet, moist, light, full of flavor and pretty to look at (I love muffins than have nice rounded tops). They are very quick and easy to make and they freeze well; what more can you ask for?

 
BLUEBERRY CREAM MUFFINS       MAKES 24

3 large eggs
1 + 1/2 cups sugar
3/4 cup vegetable oil
1 teaspoon vanilla extract
3 cups flour
3/4 teaspoon salt
3/4 teaspoon baking soda
1 + 1/2 cups sour cream
1 + 1/2 cups blueberries

In large bowl, beat the eggs and sugar until well combined. Leave mixer running and drizzle in the vegetable oil, stir in vanilla.

In another bowl, mix the flour, salt and baking soda. Add this dry mixture (to the egg mixture)alternately with the sour cream (I added it in thirds).

Gently fold in the blueberries.  Line cupcake pans with paper liners and fill about 3/4 full (I use an ice cream scoop). 

Bake in preheated 400° oven for 20 minutes (my electric oven takes 23 minutes).

* Adapted version of recipe found on Allrecipes.com

Monday 21 April 2014

SOFT MAPLE COOKIES

This recipe for SOFT and CHEWY maple cookies is excellent; they really do stay soft for days (if they last that long) and who doesn't love maple?!?! This recipe makes a large batch, so it is perfect for bake sales, potlucks or any large gathering.


1 cup butter (room temperature)
1 cup packed brown sugar
1 egg
1 cup REAL maple syrup (not pancake syrup)
1 teaspoon vanilla extract
2 teaspoons maple extract
4 cups all purpose flour
2 teaspoons baking soda
1/2 teaspoon salt
 
In the large bowl of a stand mixer, beat the butter and brown sugar till well mixed; add the egg, syrup and extracts; mix until smooth.
 
Mix the flour, salt and baking soda together, and add it to the wet mixture, one cup at a time, mixing after each addition. The cookie dough batter will be very thick.
 
Lightly grease your cookie sheets with vegetable spray or cover your baking sheets with parchment paper.
 
Roll cookie dough into 1 1/2 inch balls and roll them in granulated sugar. Place the sugared cookie dough balls (a couple inches apart) onto cookie sheet and flatten them just a little.


Bake at 350° for 8 to 10 minutes (my electric oven takes 9 minutes).
I like to cool my cookies on a sheet of waxed paper.
 
Makes about 4 dozen cookies, depending on how large you make them.


Friday 10 January 2014

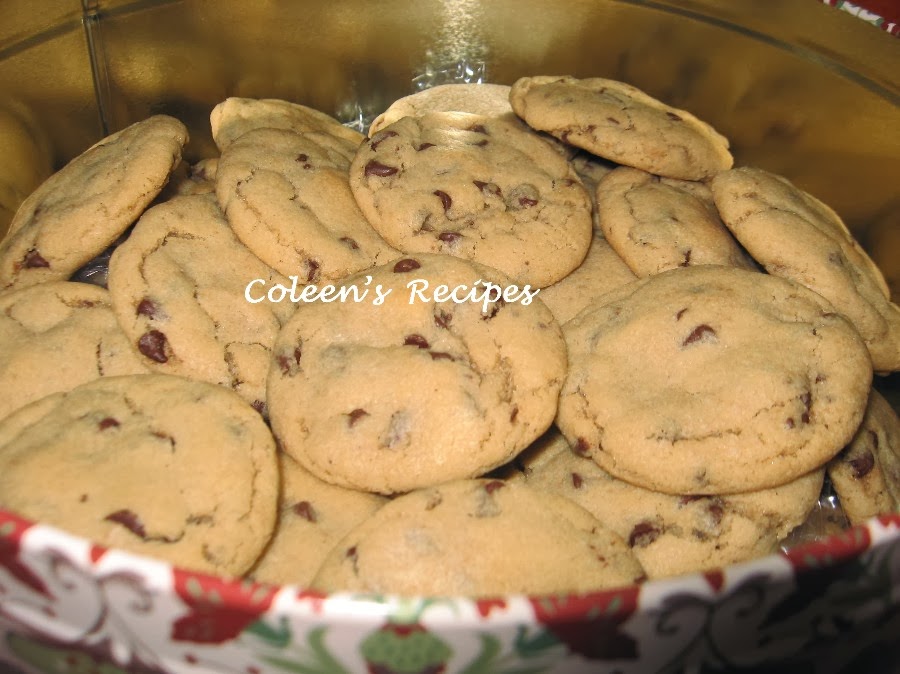
BEST EVER CHOCOLATE CHIP COOKIES

THIS RECIPE MAKES THE BEST CHOCOLATE CHIP COOKIE EVER!!
 
I've been making chocolate chip cookies for 45 years; lets just say I've tried a ba-jillion recipes, but today's recipe beats them all hands down, these cookies ARE THE REAL DEAL !!

Some chocolate chip cookie recipes have great flavor but produce a FLAT/SAGGY cookie that spreads all over the cookie sheet (I hate that). some recipes produce a picture perfect cookie, but they don't have that wonderfully chewy texture and buttery flavor that a good chocolate chip cookie needs. 

Well, I'm here to tell you that today's recipe will give you BOTH a perfectly shaped cookie AND one that tastes FIVE STAR .....THEY ARE
PERFECTION!!


The only word of caution in this recipe is that the cookie dough is THICK. I don't think I'd try it with my hand mixer, but my stand mixer worked great with this recipe.

1  1/2  cups real butter (no substitutions)(room temperature)
1  1/4  cups granulated sugar
1  1/4  cups brown sugar
2       large eggs
1  Tablespoon vanilla
4  1/4  cups all purpose flour(I use bread flour in everything)
1  teaspoon baking powder
1  teaspoon baking soda
1  teaspoon salt
2  cups chocolate chips (I use mini chocolate chips)

In the bowl of your stand mixer, combine the room temperature butter, sugars, eggs and vanilla. Beat until well mixed and smooth.

Mix the flour, baking soda, baking powder and salt together and add it, one cup at a time to the creamed butter-egg mixture. Beat until well mixed then beat in the chocolate chips.

Preheat oven to 375°F and use a UNGREASED cookie sheet. Roll the cookie dough into balls about the size of a small walnut and place on the cookie sheet about 2" apart.


Bake in pre-heated oven for 10 minutes. They will still be pretty soft-ish when they come out of the oven, but that is what you want for a soft chewy cookie. Cool them on a baking screen/rack.

This recipe makes about 5 dozen
perfect cookies
 
NOTE: Don't let the HEAVY (raw) cookie dough freak you out, after they bake, they are very tender, rich, buttery cookies.


I'm NEVER switching chocolate chip cookie
recipes again, THIS ONE is the REAL DEAL !!

Friday 20 December 2013

FIVE STAR CARAMEL CORN

If you are looking for a last minute gift idea that is super easy to make and even more easy to "consume mass quantities" (as the Coneheads would say); you have to try this caramel corn recipe from the cooks over at Table for Seven. I've tried a lot of caramel corn recipes over the years, and this is BY FAR the best one EVER!!  As a matter of fact, picky-picky husband and I ate the entire batch in one evening, we just couldn't leave it alone!!


1 bag of microwave popcorn (see note)
1 cup brown sugar (I used dark brown)
1/4 cup Karo corn syrup (the clear kind)
2 teaspoons molasses
1/2 cup butter cut into cubes
1/4 teaspoon baking soda
1/2 teaspoon salt
1/2 teaspoon vanilla

Preheat your oven to 250° and lightly spray a large baking sheet (with sides) with vegetable spray, set aside.

In a sauce pan, bring the brown sugar, corn syrup, molasses, butter and salt to a simmer. Cook and stir until this mixture reaches 250° on a candy thermometer (it takes about 5 minutes).

While the mixture is simmering, pop the bag of popcorn in the microwave then spread it out on the prepared baking sheet and let it sit in the preheated oven to stay warm.

When the caramel mixture reaches 250°, remove it from the heat and stir in the baking soda and vanilla.  Stir until very well mixed (it will get just a little foamy).

Pour over the popped corn and stir to coat. Bake coated popcorn in the 250° oven for one hour, stirring every 15 minutes or so.

After it has baked one hour, turn it out onto some waxed paper and let it cool (doesn't take long). Once it is completely cool, break apart any larger pieces and store in an airtight container (or Ziploc bag).

NOTE: I used one bag of lightly salted microwave popcorn. Personally, I don't think I would use the heavy butter flavored variety, although I'm sure it would work.

NOTE: Let the candy coated spoons/utensils sit in a cup of hot water for a little while and the candy will dissolve and wash off easily.

NOTE: Make sure the baking sheet that you use has sides. I used my roaster pan and it worked well.  You just want the sides to be tall enough that, when you stir the caramel corn you won't lose any over the edge.

NOTE: Be careful while you are stirring this caramel sauce so you don't get it on your skin (it is dangerously hot).

Once you turn the finished caramel corn out onto waxed paper, it cools down very quickly.

NOTE: The final caramel corn is lightly crunchy and not at all sticky as long as you keep it in an airtight container.

Saturday 7 December 2013

MELT IN YOUR MOUTH SHORTBREAD COOKIES

'Tis the season for Christmas cookies, and this is one of our favorites. Simple ingredients, simple instructions; you can make them as festive (or simple) as you want and they are still "melt in your mouth" delicious. Try these classic shortbread cookies for the holidays.

 
SHORTBREAD COOKIES
 
1 cup room temperature butter (no substitutions)
1/2  cup brown sugar (packed tight into measuring cup)
2 teaspoons vanilla
2 cups flour
 
In a large stand mixer (using paddle beater), beat the butter, vanilla and brown sugar (on high) for five minutes (scrape down the bowl sides half way through).
 
After 5 minutes, add the flour (one cup at a time) and beat until very well mixed and the cookie dough comes away from the sides of
the bowl.
 
Roll the dough into a log and wrap in plastic wrap. Chill for at least a couple hours (I like to chill overnight).
 
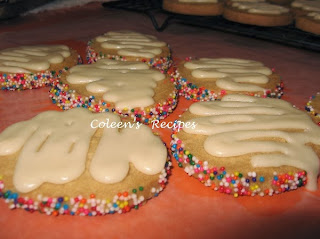
When you are ready to bake these cookies, roll the log in sprinkles or finely chopped nuts, pressing them in with your hands just a little.
 
Using a thin bladed knife, slice the cookie log into 1/4" slices and place on an UNGREASED cookie sheet.  Bake in a pre-heated 325° oven for 20-25 minutes or until edges of the cookies JUST START to change color. My electric oven takes 23 minutes.
 
Remove from cookie sheet and cool on bakers rack.  These cookies do NOT spread out when you bake them, so you can really place them close together on the baking sheet.
 
 
SPRINKLES?
 
NO SPRINKLES?
 
Just make sure you have a
tall glass of milk!!


Saturday 2 November 2013

CHEESECAKE BROWNIE CUPCAKES

This recipe is a delightful combination of a brownie layer baked under a vanilla cheesecake layer; do I have your attention yet? 

They are delicious and seriously going onto my holiday dessert tray this year. If you like chocolate (duh!!) AND you like cheesecake (double duh!!) you will love these quick and simple treats.

 
Brownie Layer
1 ounce semi-sweet chocolate
1/4 cup butter
1 tablespoon cocoa powder
1/2 cup sugar
pinch salt
1 large egg
1 teaspoon vanilla
1/3 cup flour

Heat chocolate, cocoa and butter (I use my microwave) just until melted, then stir well and set aside to cool while you do the next step.

In another medium size bowl mix sugar, egg and vanilla till smooth; add melted chocolate/butter and flour and stir just until it looks well mixed (I do this by hand - no mixer); set aside.

Cheesecake Layer
8 ounce cream cheese (room temperature)
1/3 cup sugar
1 large egg
1 teaspoon vanilla

Using electric mixer, beat the cream cheese until it is very smooth. Add the sugar, egg and vanilla and continue mixing until creamy smooth.


Preheat oven to 350°. Line cupcake pan with 12 foil liners. If you don't have foil liners, you can use paper liners, but you will have to mist them with a little vegetable spray.

Put a very lightly rounded tablespoon of brownie batter in each cupcake foil and roughly spread it around a little.

Top the brownie layer with the cheesecake mixture, dividing it equally between the 12 cupcakes.
 
Bake for 30 minutes.  Remove from oven but do not remove from the cupcake pan. Let them sit at room temperature for 30 minutes, then chill in fridge (still in pan) for several hours.


I topped these little gems with a ganache (but you don't have to).  To make that, I just mixed a large handful of chocolate chips with 1/4 cup very hot (but not boiling) heavy cream, stirring until thick and smooth.

These are also very pretty at holiday time, topped with cherry pie filling and a swirl of whipped cream; it's sort of an individual black forest cake idea.


Wednesday 9 October 2013

PECAN SANDIE COOKIES

I think of my dear sweet mother every time I make these pecan sandie's, they were her favorite kind of cookie; I think Keebler made them if I remember correctly. 

This cookie is buttery, sweet, tender and  they melt in your mouth (and there are NO EGGS). The cookie dough is formed into logs, then chilled, then sliced and baked at your convenience. 

This recipe makes a lot of cookies, so you can also bake part of them and save the rest of the chilled dough for later in the week!! It is also a great holiday recipe because they travel well and they are always a hit at cookie exchanges.

2 cups butter (no substitutions) room temperature
1 cup granulated sugar
1/2 teaspoon salt
2 teaspoons vanilla extract
1 teaspoon coconut extract (see note)
4 cups all purpose flour
1 cup chopped pecans

In the bowl of an electric mixer, beat the room temperature butter, sugar, salt and extracts until the mixture is light and fluffy (takes a few minutes and looks sort of like whipped cream when you are done).

Add the flour, one cup at a time, until well mixed. The dough will seem VERY thick, so a stand mixer works best but it isn't absolutely necessary. You will know you have mixed it enough when the cookie dough starts to come away from the sides of the mixing bowl.

Divide the dough into 4 logs about  2" in diameter. Roll the logs in plastic wrap and chill in the fridge for about an hour (or up to several days).

When it's time to bake, slice the cookie dough logs into 1/4" slices and roll (tops and bottoms) in granulated sugar.  Place on ungreased cookie sheet and bake at 350 degrees for  18-20 minutes (my oven took exactly 18 minutes) or until the edges are JUST STARTING to turn golden.


NOTE: You will not taste the coconut extract in the final cookie, but it lends a wonderful "background" flavor that is reminiscent of those great Royal Dansk Danish butter cookies that come in round tins at Christmas time.

Saturday 28 September 2013

PEANUT BUTTER KRISPIE TREATS

This "recipe" couldn't be easier, faster or tastier. In this batch, I added 3/4 cup of miniature chocolate chips to the final mix stage, but the straight peanut butter squares are to-die-for delicious!! They are excellent for snacking, for bake sales, for lunch boxes and especially for "whenever"!!

1 cup sugar
1 cup corn syrup
1 cup peanut butter

Mix the above ingredients in a sauce pan that has a nice heavy bottom. Heat (on medium) until you JUST START to see bubbles around the edge of the pan (watch and stir,  because this mixture wants to scorch if you heat it too fast).

As soon as you see the little bubbles around the edges of the pan, remove from heat and stir in 1 teaspoon of vanilla; mix well.

Pour over 6 cups of Rice Krispie cereal and mix well. If you are going to add the miniature chocolate chips; add them after the peanut butter mixture has coated the cereal; the heat of the mixture will melt them just a little, so don't add the chocolate too early.

Pour into a lightly buttered 11" x 7" dish. Pat down with slightly dampened hands. Allow to cool completely and cut into squares.

NOTE: I don't butter my dish, I spray it with vegetable spray and then use a paper towel to wipe out the excess, that way the squares don't have a "greasy" side and the squares DO NOT STICK to the pan.

NOTE: If you have any treats left, after your family descends upon these, store them in an airtight container, or cover tightly with plastic wrap.

Saturday 10 August 2013

LUNCH BOX APPLE-PUMPKIN MUFFINS

School lunches are right around the corner,
and these muffins are SUPER moist (they taste even better on day two and three as long as you keep them covered well) AND they are packed with flavor!!

Make a batch of these for  school lunches, or a bake sale or share them at work. You will love this muffin!!!

 This recipe goes together quickly and easily and the muffins bake up with nice round tops covered with a sweet streusel topping. Makes 18 muffins. I don't even use a mixer for this recipe, just a hand whisk works well.

2 1/2 cups flour
2 cups white sugar
2 teaspoons cinnamon (see substitution note below)
1/2 teaspoon ground ginger
1/2 teaspoon ground nutmeg
1 teaspoon baking soda
1/2 teaspoon salt
2 eggs slightly beaten
(1) 15 ounce can of pumpkin
1/2 cup canola oil
2 cups cooking apples (peeled and chopped small)

Preheat oven to 350°. In large bowl, mix dry ingredients until well combined, set aside.

In another bowl, whisk all of the wet ingredients until smooth, then stir in the chopped apples by hand. 

Mix the bowl of wet ingredients into the bowl of dry ingredients. Spoon batter equally into paper lined cupcake pans. Top with streusel topping (optional) (recipe below) and bake for 35-40 minutes at 350°.

Muffins are done when toothpick inserted in center comes out clean.

STREUSEL TOPPING   (optional)
2 tablespoons flour
¼ cup white sugar
½ teaspoon cinnamon
4 teaspoons melted butter

Mix streusel ingredients with your fingers until you get a dry crumbly topping. Put a little on each muffin before you bake.

NOTE: You can substitute 1 tablespoon pumpkin pie spice for the cinnamon-ginger-nutmeg combination.

NOTE: Let muffins cool down a little, but before they are entirely cold, cover with plastic wrap. Muffins should be stored covered.

NOTE: Recipe says to bake for 35-40 minutes. My oven cooked these in 35 minutes exactly.

Tuesday 9 April 2013

BEST PUMPKIN BARS EVER !!! (Plus)

I've made pumpkin desserts for many more years than I care to count: pumpkin bread, pumpkin cake, pumpkin muffins, pumpkin pie, pumpkin bars, etc., etc., but today's recipe for super moist pumpkin bars is BY FAR THE BEST pumpkin recipe I've EVER tried !!!

They are light as air; they taste like pumpkin pie and they are SUPER, SUPER moist; they are totally addicting!! Since this recipe makes a large 10" x 15" pan, they would be excellent for a potluck, bake sale or weekend crowd. However if you are like us, and a 10" x 15" is just too much, check out the mini-version of this recipe at the bottom of this post.


4 large eggs
1 2/3 cup granulated sugar
1 cup vegetable oil
15 ounce can of pumpkin puree(see note)
2 cups all purpose flour
2 teaspoons baking powder
1 teaspoon baking soda
2 teaspoons ground cinnamon
1/2 teaspoon ground ginger
1/4 teaspoon ground cloves
1 teaspoon salt

This is super easy to make, just put the eggs, sugar, oil, pumpkin and spices in a large bow and mix with electric mixer until it gets nice and light (just takes about 30 seconds, but it is an important step).

Next add everything else, and mix until it is well combine, but don't over mix. I do this step with a  hand whisk.

Spread it into a lightly greased 10"x15" jellyroll pan and bake at 350°F for 25-30 minutes or until it springs back when lightly pressed. Cool completely before frosting.

FROSTING
8 ounces of cream cheese (room temperature)
1 cup butter (room temperature)
2 teaspoon vanilla extract
4 cups powdered sugar

Cream the cheese and butter together, add the sugar and vanilla and beat until smooth. Spread evenly on cooled bars. If frosting seems too thick, add milk (1 tablespoon at a time) until you get the consistency you like.

Here's the Mini-recipe:

A 10"x15" pan is just way to big for us empty-nesters, so here is a reduced size that fits perfectly in an 8"x4" loaf pan. I remove it from the loaf pan, frost it and then slice it (I get about eight 4" x 2" pumpkin bars out of this recipe).


1 egg
1/3 + 1 tablespoon + 1 teaspoon sugar
1/4 cup vegetable oil
1/2 cup pumpkin puree
1/2 teaspoon ground cinnamon
1/8 teaspoon ground ginger
pinch of ground cloves
1/4 teaspoon salt
1/2 cup flour
1/2  teaspoon baking powder
1/4  teaspoon baking soda

Follow same directions as above except use an 8"x4" loaf pan. I lined the bottom with parchment so I could just lift the bars out of the pan after cooking (for easy slicing). Bake at 350 for 25-30 minutes (my electric oven takes 30 minutes). Let cool completely then slice into bars.

FROSTING
I used half of the above frosting recipe because we like a lot of frosting. 

NOTE: Make sure you use plain old pumpkin puree, not the kind of canned pumpkin that already has spices in it. If you want to use the kind with the spices already in it, just reduce the spices in the recipe.

Sunday 27 January 2013

BUTTER COOKIES

These big 4" cookies are crispy, light as a feather and full of butter-y goodness. They are too fragile to ship through the mail, but straight out of the cookie jar, they are melt in your mouth perfection.

1 1/4 cups butter (room temperature)
1 1/2 cups granulated sugar
3 egg YOLKS
2 cups all purpose flour
1 teaspoon baking soda
1 teaspoon cream of tartar
1 TABLESPOON of vanilla extract

Cream the room temperature butter and granulated sugar with your stand mixer. Once smooth, add the egg yolks, one at a time, and beat well in between each addition; beat in the vanilla.

Mix the flour, baking soda and cream of tartar, and add this mixture to the butter mixture, one cup at a time. Mix well.

Cover and chill the dough for about 30  minutes.

Roll the dough into 1" balls and roll them in granulated sugar.  Place on an UNgreased cookie sheet (3" apart)and flatten slightly.

Bake in 350° preheated oven for 10-12 minutes or until the edges of the cookies are golden.  Recipe makes 3½ dozen cookies.

Rolling dough into 1" balls, will give you 4" cookies, so leave lots of room between each cookie ball on the cookie sheet.


Tuesday 15 January 2013

PEANUT BUTTER SNACK CAKE

Are you old enough to remember the snack cake craze? Simple sweet cakes made for no special occasion, other than to just "snack on"; they were great. I don't  know when, or why, they faded from the scene, but I've decided to bring them back into my kitchen as a welcome change from the ever present cookie jar. Peanut butter cake, studded with mini-chocolate chips and frosted with a peanut butter and honey frosting...what's not to love?!
This cake is delicious and, if kept covered, stays moist for several days. The recipe ingredients listed here are for a 10" round cake, but you can double the ingredients and bake it in a 9"x13" pan as well.

1 cup all purpose flour
1 cup brown sugar (packed)
1/2 cup peanut butter
1/4 cup butter (room temperature)
1 teaspoon baking powder
1/2 teaspoon baking soda
1/2 cup milk
1 teaspoon vanilla
2 eggs
1/2 cup semi-sweet mini-chocolate chips

In the bowl of an electric mixer, beat the flour, sugar, peanut butter and butter until it is crumbly.

Add the rest of the ingredients (except the chocolate chips) and mix on low speed until everything is well combined, then mix on med-high speed for three minutes.

Dust the mini-chocolate chips with a tablespoon of flour and then shake off the excess (this will keep them from sinking in the batter as they bake). Stir chips into the batter.

Bake in a greased and floured 10" round pan at 350° fir 35-40 minutes or until toothpick tests clean (my electric oven took 35 minutes).

Cool in the pan for 10 minutes then turn out onto serving plate.
FROST THIS CAKE WHILE STILL HOT!!

PEANUT BUTTER AND HONEY FROSTING
1/2 cup peanut butter
2 tablespoons honey
1 teaspoon vanilla extract
2 cups powdered sugar
4 to 5 tablespoons milk
Warm the peanut butter and honey in the microwave until it is soft but not melted. Add the rest of the ingredients and beat with electric mixer until smooth and creamy.  FROST CAKE WHILE STILL HOT.

NOTE:  If you double this recipe for a 9"x13" cake, 
make sure you double the frosting as well.


Friday 11 January 2013

CHEWY MOLASSES COOKIES

Warmly spiced, sweet and chewy; these cookies are perfect for ANY cookie exchange. Molasses cookies are the quintessential Christmas cookie.

 
3/4 cup butter (room temperature)
1 cup brown sugar (packed)
1 egg
1/4 cup molasses
2 cups all purpose flour
1 teaspoon baking soda
1/4 teaspoon salt
1 teaspoon ground cinnamon
1/2 teaspoon ground cloves
1/2 teaspoon ground ginger

In the bowl of an electric mixer, combine the room temperature butter, brown sugar, egg and molasses; mix until smooth, scraping the sides of the bowl if necessary.

Add the flour, baking soda, salt and spices and mix well.  Cover and chill the dough for about an hour.

Roll the dough into balls about the size of a small walnut and roll them in granulated sugar (important step). Place them on an ungreased cookie sheet (about 2" apart) and flatten them just a little (I use the flat end of a drinking glass dipped in sugar). 

Bake at 375° for 8 minutes (the tops will have a wonderful crackle look). Be careful not to over bake them. 

The cookie batter (inside of the crinkle/cracks of the baked cookie) will still look a little "wet" after 8 minutes in the oven, but they will be perfectly baked and chewy when they cool off.  If you like a crisp cookie instead of a chewy cookie, leave them in the oven for another minute or so.

To keep these cookies soft and chewy, store them in a Ziploc bag or any Tupperware that has a tight fitting lid. These cookies freeze (and ship) very well and they smell heavenly when you open the cookie jar!!!


Friday 30 November 2012

EASY THIN MINT COOKIES

Do you like Girl Scout thin mint cookies as much as I do? If so, you are in luck with this super easy, super quick, TWO INGREDIENT recipe.

They are so EASY to make, that I can't even call this a "recipe" because it uses all pre-prepared ingredients and it REALLY DOES taste just like a thin mint cookie!! 


I put a little extra white chocolate decoration on these, just for fun,
but it certainly isn't necessary.

You will need some Nabisco Famous Chocolate Wafers and some Andes (creme de menthe) chocolates.....that's it!!
 
The chocolate wafers come in a 9 ounce package and I found the Andes Mints (those creamy little chocolate mints with the green center) in a 4.67 ounce package.  There are 28 mints in the package and one package will do a dozen cookies (I found the mint packages for $1.60 here in Alaska, so hopefully you can find them even cheaper.

I unwrapped and then melted the chocolates in my microwave for about 30 seconds...stirred and then microwaved them for another 10 seconds (stir until the chocolate is smooth and shiny). Dip the chocolate wafers in the melted chocolate (both sides) and place on some parchment paper (or Silpat). Stick them in the fridge (I used the freezer) for about 5 minutes to "set" the chocolate......that's it!!  


NOTE:   I noticed that they now sell Andes Mint  baking chips (next to the chocolate chips).


Wednesday 31 October 2012

PUMPKIN SPICE CUPCAKES

This is a wonderful recipe for several reasons: the cupcakes are super moist and tender, they are mildly spiced and the batter goes together with one bowl and a whisk; what could be easier? They are so tasty, that they really don't need a frosting, although I like to serve them frosted with a simple maple flavored butter cream (pumpkin and maple are MADE for each other). Everyone loves these simple cupcakes!!

In a large bowl, mix together with a whisk:

(1)  15 ounce can of pumpkin (not pie filling)
1 2/3  cup of granulated sugar
1 cup vegetable oil
4 eggs
2 teaspoons ground cinnamon
(scant) 1/2 teaspoon ground cloves
(scant) 1/4 teaspoon ground nutmeg

Whisk together until very well mixed, then add:

2 cups all purpose flour
2 teaspoons baking powder
1 teaspoon baking soda
1 teaspoon salt

Mix well, then stir in 1/2 cup of raisins (optional).

Fill cupcake papers 3/4 full.  Bake in a 350 oven for 23-25 minutes (my electric oven takes 23 minutes) or until toothpick tests clean.  Remove and cool.

After the cupcakes have cooled, dust the tops with powdered sugar or frost with your favorite frosting.


I never measure my "everyday" frosting, but here's a stab at it:

Melt 3 tablespoons butter; add 1 teaspoon vanilla extract and 1/2 teaspoon maple extract.
Add 1 to 1½ cups of powdered sugar and a couple tablespoons of cream.  Whisk till smooth. If it seems a little to dry, add another tablespoon of cream.  If it seems a little too wet, had another spoon of powdered sugar.  

MAKES 24 CUPCAKES

Friday 28 September 2012

PEANUT BUTTER CREAM BARS

I've been making these bars since my kids were little; now I make them for my grandchildren. I think that is the mark of a great recipe, don't you? 

This cookie bar has a creamy (peanut butter and sweetened condensed milk) layer between two chewy oatmeal cookie layers. As if that wasn't enough, the finished bars are drizzled with a peanut butter frosting glaze. They are SO GOOD and they make a great bake sale item.

 
 2 cups raw quick oats
1¾ cups brown sugar
1½ cups all purpose flour
1 teaspoon baking powder
½ teaspoon baking soda
1 cup butter
2 cups chocolate chips (or 1 cup mini chocolate chips)
1 beaten egg
14 ounce can sweetened condensed milk (not evaporated)
1/3 cup creamy peanut butter

Combine the first 5 ingredients in a large bowl and then cut in the butter (like you would for a pie crust). I do this step with an electric mixer, but don't do it with a food processor because it will chop the oatmeal to finely.

Remove 1¾ cups of these crumbs and put them in a small bowl with the chocolate chips and set it aside.

Mix the beaten egg into the remaining crumb mixture (not the part with the chocolate chips) and mix well. Press this mixture into a greased (I use parchment paper instead of grease) 10" x 15" x 2" baking pan and bake in preheated  350 oven for 15 minutes.

While the base is in the oven, whisk the sweetened condensed milk together with the creamy peanut butter and set aside.

When the partially baked crust comes out of the oven, drizzle the milk-peanut butter mixture evenly over the crust. Sprinkle evenly with the reserved crumb-chocolate chip mixture and bake, at 350, for another 15 minutes.

Drizzle the baked bars with peanut butter frosting while they are still warm. Cool completely in the pan before cutting into squares.


NOTE: For ease of cutting, I line the pan with parchment paper and leave the sides a little long, so I can grab the COOLED bars and lift them out of the pan for slicing.

PEANUT BUTTER GLAZE
1/2 cup creamy peanut butter
2 tablespoons butter soft
1 teaspoon vanilla extract
2 cups powdered sugar
4 tablespoons milk

Now keep in mind, I NEVER, and I mean NEVER measure ingredients for a cake glaze, so I'm hoping these amounts work for you.  Heat the peanut butter and butter in the microwave until it is nice and soft.  Add the vanilla, milk and sugar and whisk till smooth.  If it seems a little dry, just add another tablespoon or so of milk. If it seems too soupy, add a tablespoon or so more powdered sugar.  When the glaze is nice and smooth, drizzle it over the warm bars.


Tuesday 11 September 2012

PEANUT BUTTER BROWNIES with CHOCOLATE-PEANUT BUTTER FROSTING

We are huge fans of peanut butter and chocolate together, are you? This peanut butter brownie has peanut butter and miniature chocolate chips in the batter and a peanut butter - chocolate frosting on top...oh my, it was good!!!


1½ cups all purpose flour
1 teaspoon baking powder
¼ teaspoon salt
6 tablespoons butter, room temperature
½ cup smooth peanut butter
2/3 cup granulated sugar
2/3 cup brown sugar
3 eggs
1 teaspoon vanilla extract
1 cup miniature semi-sweet chocolate chips

Preheat oven to 350 and spray a 8" x 11" baking dish with vegetable spray.

After you measure the flour, remove a tablespoon of it and toss it with the miniature chocolate chips...set aside (this will keep the chocolate chips from sinking in the batter as they bake).

Cream the peanut butter and room temperature butter until smooth.  Add the sugars, vanilla and eggs and beat until smooth with electric mixer.

Add the flour, baking powder and salt and beat on low until combined (don't over-beat). Stir in the flour coated miniature chocolate chips.

Spread in the prepared baking dish and bake 35-40 minutes. NOTE: At 35 minutes, my brownies looked a little dark, so I just shut the oven off and let them sit in there for another few minutes. Use toothpick to test for done-ness.

Remove from oven and place pan on a cooling rack for 20 minutes or so before frosting. 


If you let these frosted brownies cool completely, they will cut cleanly like this.  

I frosted these with my chocolate - peanut butter frosting...posted HERE

Saturday 1 September 2012

PEANUT BUTTER CHOCOLATE CHIP COOKIES

Picky picky husband loves anything peanut butter and I love anything chocolate; so I combined two of our favorite recipes and this cookie "was born".  It is a GREAT lunch box or picnic cookie, as they travel well and stay soft if you keep them in a lidded cookie jar.
1/2 cup butter flavored Crisco  (see note below)
1/2 cup creamy peanut butter (I use Jiff)
2 eggs
1 teaspoon vanilla extract
1/2 teaspoon salt
1 teaspoon baking soda
1/2 cup brown sugar
1/2 cup granulated sugar
2 ¼ cups all purpose flour
1/2 cup miniature chocolate chips
1 cup chopped pecans

Cream the butter flavored Crisco, peanut butter, eggs and vanilla until smooth and creamy. Add the sugars and mix well.

Add the flour, salt and baking soda and mix well. Stir in the miniature chocolate chips and pecans.

Roll into balls about the size of a walnut and bake on parchment paper lined baking sheet for 10-12 minutes (at 375 degrees) until they are very light golden around the edges.

They won't look quite "done" in the center, but trust me...they are.

NOTE: Some people freak out about using Crisco in cookies, however, 99.9% of the reports show that there is virtually zero difference between Crisco and butter when it comes to saturated fat, not to mention there is zero cholesterol in Crisco (something you can not say about butter).  Just make sure (for flavor sake) you use butter flavored Crisco.

I have no idea how these cookies turn out if you use all butter... I just know that in classic chocolate chip cookies, you get a super thin misshapen cookie if you use butter... but if you use butter flavored Crisco in that same recipe, you get a nice thick, perfectly round cookie.

NOTE: I like to use miniature chocolate chips in my cookies because they distribute in the batter well, however, regular size chocolate chips would work too.

Tuesday 10 July 2012

EASY BUTTERSCOTCH CANDY BARS

This delicious recipe (posted by Ellen b. over at MGCC) was originally a cookie bar; but you know me, I can't leave a recipe alone, so I doubled the topping ingredients and the end result was almost like a candy bar. I served them at a BBQ, recently, and they were inhaled by kids and adults alike. They are SO easy to make, but a warning here... they are totally addicting!!

 
COOKIE BASE (original version)
1½ cups all purpose flour
¼ teaspoon salt
½ cup butter (room temperature)
¾ cup brown sugar

Mix the flour, salt and brown sugar, then cut the room temperature butter into the mixture. To do this, I used my stand mixer with a wire whisk on medium high and it gave me fine crumbs like this, which is perfect. Put the crumbs into a 9 x 13 baking dish that has been sprayed with vegetable spray.
Level the crumbs out with your fingers and then pat them down evenly. I used the bottom of a smooth  measuring cup to tamp down the crumbs, which produced a nice flat layer like this:
Bake in a preheated 350F oven for 15 minutes.

While the cookie base is baking, mix the following ingredients in a microwave safe bowl:

BUTTERSCOTCH TOPPING (my version)
12 ounces of butterscotch baking chips
½ cup light corn syrup (I use  Karo syrup)
4 tablespoons butter
2 tablespoons water
¼ teaspoon salt

Melt the above ingredients in the microwave, stirring every 30 seconds (my microwave took about 75 seconds). When the mixture is completely smooth, add two cups of coarsely chopped (and toasted) pecans.

After the cookie base has baked for 15 minutes, remove from the oven and spread the butterscotch-pecan mixture over the top and put back in the oven for another 8 minutes.

Cool completely before slicing.
Store in lightly covered cookie jar.

Thank you for sharing the original recipe Ellen b.