Showing posts with label CHERRY DESSERTS. Show all posts

Tuesday 28 January 2014

FRUIT FILLED COOKIE BARS

I had a hard time coming up with a name for this delicious treat. It is not exactly a cake, but it's a little soft to be a cookie. It does remind me a little of one of those big soft cake-y sugar cookies, but don't forget it has a juicy fruit filling too, so what category does it really fall into?  Answer: Yummy Category!!


Usually, we just eat these out of hand, but they are also nice enough for company if you serve them with a scoop of ice cream!! Either way they are hard to beat with a tall glass of milk or a hot cup of tea.

1/2 cup butter (room temperature)
1 cup sugar
2 eggs
1 1/2 cups flour
1 teaspoon vanilla
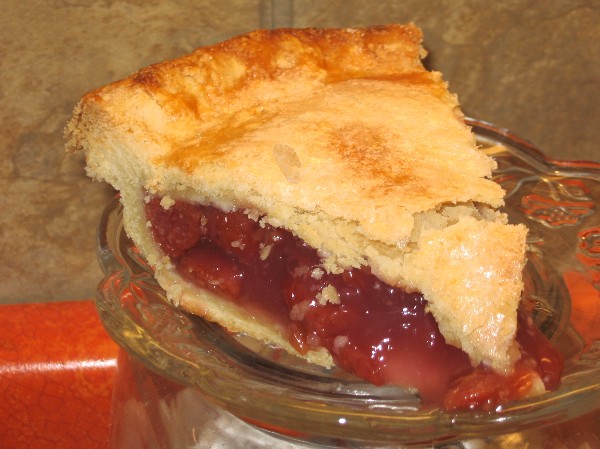
14 ounce can fruit pie filling (see note)

Cream butter, sugar and vanilla together until very well mixed. Add the eggs, one at a time, beating well in between each egg.

Add flour and beat until well mixed, then let the dough sit for about 5 minutes.

Press 3/4 of the dough into a lightly greased 9" x 9" pan (I use a (9" springform pan).  Make the outside edge just a little deeper than the rest of the crust (this will help keep the fruit away from the edge of the pan).

Top with fruit filling (see note) and then drop little bits of the rest of the reserved dough on top of the fruit filling.

Bake in a pre-heated 375 oven for 35-40 minutes depending on how hot your oven runs. My electric oven takes 37 minutes.

Let cool for a while then drizzle with a vanilla frosting glaze.

Cool and store covered.


NOTES:

Any home made or commercial fruit filling will work well in the recipe, but I suggest that if you use a commercial pie filling, that you jazz it up a little. Example: if you are using cherry pie filling, add 1/4 teaspoon of almond extract, if you are using apple pie filling, chop them up a little and add a little more cinnamon and nutmeg or maybe a few raisin? Use your imagination.

You can double the ingredients and bake it in a 9" x 13" pan for 40-45 minutes.  Either way, use the toothpick test to make sure its done in the middle.


Friday 25 October 2013

FRUIT CRUMB BARS

This is one of those wonderfully versatile recipes that is just as good with apple filling, as it is with cherry filling, or blueberry; whatever your family likes the best.

The crumb crust/topping goes together in just a couple minutes with the food processor and if you can wait long enough for the bars to cool down to room temperature, they cut beautifully. We (obviously) couldn't wait that long (in the photo below).


CRUMB CRUST/TOPPING
3 cups all purpose flour
1 cup white sugar
1 teaspoon baking powder
1/4 teaspoon salt
1 cup COLD butter (cubed)
1 egg, beaten

Put the flour, sugar, baking powder salt and cubed butter into the food processor and pulse until well mixed.  If you don't have a food processor, do it with a pastry cutter and work it until the butter is well mixed. Add egg and mix well (it will look like coarse sand).

Press HALF of this mixture into a greased 9" x 13" baking dish.  Top with fruit filling and top with the other half of the crumb mixture.

Bake at 375° if you are using a metal baking pan or 350° if you are using glass, for 40 minutes or until top crumbs are light golden.

If you cool the bars completely before you cut them,
they will cut very neatly (it is not necessary, but it
makes for a prettier presentation.
 
CHERRY FRUIT FILLING (or use your favorite filling)
(2) 14 ounce cans tart pie cherries packed in water
1 1/2 cups sugar (DIVIDED)
4 tablespoons + 2 teaspoon cornstarch
pinch of salt
1/2 teaspoon almond extract (do not leave out)

Drain the cherries, but save the juice.  Put one cup of the juice in a saucepan and add HALF of the sugar, the cornstarch and salt. Bring to a boil and cook until nice and thick.

Remove from heat and stir in the OTHER HALF of the sugar, the cherries and the almond extract. 

Glaze   (optional)
2 tablespoon butter melted
2 cups powdered sugar
3-4 tablespoons milk
1/2 teaspoon vanilla extract
1/2 teaspoon almond extract (do not leave out)

While bars are still a little warm, mix 2 tablespoons melted butter with 2 cups powdered sugar, about 3 or 4 tablespoons of milk and 1/2 teaspoon vanilla extract and 1/2 teaspoon almond extract. Whisk until smooth and drizzle over fruit bars.

Friday 16 August 2013

POT LUCK MINI CHERRY PIES

These "Grab-and-Go" mini cherry pies are perfect for large gatherings and family or church potluck dinners. The dough can be made days ahead and baked off when you have some "extra" time, which is a big help.

Guests (at least mine) seem to appreciate PIE at a potluck, but traditional pie can be messy to serve, especially for children. These little "two bite" beauties are perfect. This recipe makes 24 pies, but the recipe doubles easily.


CRUST

1/2 cup butter  (room temperature)
3 ounces cream cheese (room temperature)
1 cup flour

Mix with electric mixer (I use my stand mixer with paddle attachment) until you get a smooth dough. Wrap it in plastic and chill for about an hour (will also keep well in fridge for several days).

FILLING

(1)  14½ ounce can tart pie cherries packed in water
3/4 cup granulated sugar (divided)
2 tablespoons + 1 teaspoon corn starch
pinch of table salt
1/4 teaspoon almond extract (do not leave out)
1 teaspoon butter

Drain the cherries, reserving the liquid. Pulse the cherries in the food processor until fairly well chopped then drain again (I even press on the cherries a little to remove excess liquid): set aside.

 In a saucepan, combine 1/2 cup of the reserved cherry juice, HALF of the sugar, the cornstarch and a pinch of salt. Whisk till smooth and bring to a boil. When this mixture gets super thick (it will happen FAST once it starts to thicken), remove from heat and stir in the rest of the sugar, the chopped cherries, the almond extract and butter. Stir until well mixed; let cool while you form the crusts.

 Preheat oven to 375°. Cut the chilled dough into 24 pieces and roll each piece into a ball. Place one ball in each mini-muffin cup (no need to grease the pan).

Now, you have to use your fingers and push the dough across the bottom and up the sides of each mini-muffin space.  Better yet, if you have tart tamper or something similar, this step will go MUCH faster (just dip it in a little flour between each use).  I use the rounded end of the wooden tool that came with my Kitchen Aid meat grinder, it works absolutely perfectly. Try and get the crust edges just a little taller than the edges of each muffin cup (see 2nd photo).

Fill each mini-crust 2/3 full of the cherry filling. Bake at 375° for 20 minutes on the TOP RACK of your oven.   When the edges of the crust are light golden brown, they are done. 

IMPORTANT:
Don't try to remove the cooked pies from the pan right away. The filling stays hot for a while, so let them cool for a good 25 minutes or so. You can use a butter knife to help "lift" the pies out of the pan. 

BETTER YET: line the mini-muffin pan with mini-cupcake papers and that should solve any/all problems.

 
Delicious and FUN to Serve!!

Tuesday 19 June 2012

CLASSIC CHERRY PIE

If you follow my blog regularly, you know that I enjoy combining recipes to get an end result that suits us. That's what I did with this cherry pie recipe.

The first cherry pie recipe I tried tasted OK, but there was a watery liquid in the bottom of the pie that seperated from the filling...not a good thing.

Next, I tried a recipe that used flour as a thickener, but it left a cloudy filling ... not what I wanted.

Next I tried tapioca to thicken the filling and it eliminated the cloudy fruit filling problem, but it was hard to guage just how much tapioca was enough and how much was too much; it also produced inconsistent results...not good.

So, as usual, I took a little bit of this recipe and added it to that recipe and then threw in a couple of my own ideas and came up with todays recipe. I served it on Father's Day and picky-picky husband actually said  "This is THE best cherry pie I've ever eaten!!"  After I picked myself up off of the floor (not literally, lol) , I knew I had a winner!!!


The filling is sweet and the crust is unbelievably flaky and delicious.  Some people freak out with a pie crust that uses shortening, however, not only does shortening produce a flakier crust, but it has HALF of the saturated fat of butter!! NOTE: I always us butter flavored Crisco in my crusts.

CHERRY PIE FILLING

(2) 14 ounce cans unsweetened tart pie cherries
1 1/2  cups granulated sugar     DIVIDED
4 tablespoons + 2 teaspoons corn starch
pinch of salt
1/2 teaspoon almond extract  (do not leave out)
2 teaspoons butter, room temperature

Drain the cherries but SAVE THE LIQUID.  Put one cup of the liquid into a heavy saucepan with the corn starch, salt and HALF OF THE SUGAR, mix well.

Bring this mixture to a boil, while stirring, and cook until it gets VERY THICK (only takes a minute or so once it starts to boil (keep stirring fast).

Remove from heat and stir in the butter, almond extract and the OTHER HALF of the sugar, mix well.  Gently fold in the drained cherries.  Let cool while you make the pie crust.


This is the all time best pie crust I have EVER made and I've made tons of them.  This dough handles beautifully (no need to chill the dough) and makes either 3 single crusts or a large 2 crust pie with some left over. Everyone I've served this crust to is wild about it.

PIE CRUST

4 cups all purpose flour
1 3/4  cups butter flavored Crisco shortening
2 tablespoons sugar
1 teaspoon salt
1 large egg
1 teaspoon vanilla
1/2 cup ice cold water

Cut the shortening into the flour with a pastry cutter (or a couple of forks) until the shortening is about half the size of a green pea.

Mix the sugar, salt, egg, vanilla and ice water together, until well mixed, then add it all to the flour-shortening mixture. Work it with your hands until everything comes together in a big ball. Try to do this fairly quickly so that the heat of your hands doesn't melt the shortening. No need to chill this dough.

Roll out a bottom crust, on a floured counter,  to fit a 9" pie pan.  Put the cherry filling into the bottom crust and then brush the edges of the crust with a little egg white that has a few drops of water whisked into it (this will help "glue" the bottom crust to the top crust).

Roll out a top crust, on a floured counter, and lay it over the filled bottom crust.  Cut off the extra dough that hangs over the rim of the pie plate (see note). Pinch the top and bottom crust edges together (or use a fork). 

After you have pinched the two crusts together, brush the top pie crust with more of the egg white wash (the same that you used to "glue" the edges ) and then sprinkle the whole surface, lightly, with granulated sugar.

Cut several small vent holes in the top crust.  Bake in 375 preheated oven for 35 to 45 minutes or until the crust is golden brown (I usually leave it in for 45 minutes). COOL PIE COMPLETELY BEFORE CUTTING.

 
NOTE: When you are trimming the excess unbaked crust from around the rim of the pie pan, leave it just a little long so that you can tuck under the edge before you pinch the pie edge into a design.

NOTE: I bake all of my pies on a cookie sheet just in case they spill over.

Thursday 23 June 2011

SUPER EASY CHERRY STRUDEL

This strudel is made with Pepperidge Farm Puff Pasty (from the freezer section) and it couldn't be easier. It slices beautifully and it is delicious served warm with a big scoop of vanilla ice cream, but it is also excellent at room temperature. It is a huge hit at our house!!


1 sheet of frozen puff pastry (thawed)
(1) 14½ oz. can red tart pie cherries packed in water
¾ cup granulated sugar (divided)
2 tablespoons + 1 teaspoon corn starch
pinch of salt
¼ teaspoon almond extract
2 drops red food coloring (optional)

Drain the cherries (but save the juice).  Mix ½ cup of the juice from the cherries, with half of the sugar and all of the cornstarch and a pinch of salt.

Cook (constantly stirring) the juice mixture on medium heat for 3 or 4 minutes or until it gets ULTRA thick.  Remove from heat and stir in the rest of the sugar, the drained cherries and almond extract. Mix well and lay some plastic wrap on the surface of the hot mixture and chill for an hour (or until really cold).

CRUST
You can either let one sheet of puff pastry (a box comes with 2 sheets) thaw in the refrigerator overnight (thats the best) or you can speed thaw on the kitchen counter (I wrap it in plastic wrap) for about an hour. The box says 40 minutes, but it really is a lot easier to work with if you let it sit for an hour.

Dust your counter with a little flour and roll out the dough to a 12" x 16" rectangle.  Spread the cherry filling on one half (keep it about an inch away from the sides) like this:


Starting with the fruit end, just roll it up and crimp the ends.  Lay it on a parchment paper lined baking sheet (or spray with vegetable spray). and brush it all over with egg wash (1 egg beaten with a teaspoon of water). Sprinkle generously with granulated sugar and then cut a few slash marks across the top of the strudel (for venting) but don't cut too deep.


Bake in preheated 375 oven for 35 minutes, or until golden brown.  Makes one 12" strudel. Enjoy!!

NOTE: For those who aren't familiar with it, Pepperidge Farm Puff Pastry is found in the freezer section of your grocery store, near the Cool Whip etc., it comes in a 17.3 ounce package that contains 2 sheets.

Tuesday 14 December 2010

EASY FRUIT LADDER

I've made this fruit ladder a million times. It is super simple, fast, looks impressive on any dinner table and is delicious. The dough works beautifully, is very forgiving and never fails!! You can make this ladder with any pre-cooked fruit filling (home made or commercial).


I have had people tell me this looks hard to make, but trust me, it is not. There is just one little trick: roll the dough out into a rectangle and then move it to your baking sheet BEFORE you try to make the ladder. You can't move the ladder (and keep it's shape) after it is filled. This dough is the real secret to this recipe.

Preheat oven to 350°

1 cup butter softened
1 cup sour cream
2 cups flour

Mix ingredients with an electric mixer (the dough will be a little sticky before it is chilled). Divide dough in half (this recipe makes TWO ladders). Put each ball of dough in some plastic wrap and rough it into a large disk shape…cover well and refrigerate 1 hour (extremely important).


After an hour, remove from fridge and flour your counter top and rolling pin. Roll one of the disks into a rectangle about 15” x 10”. Pick up the crust rectangle (it will not break) and lay it on a lightly greased baking sheet.

Now I could describe, at length how to do this next step, but a picture will describe it much quicker:


Find the center of your crust rectangle, and spread your fruit filling in a 3” wide strip, long-wise, right down the center of the rectangle (keep the fruit about an inch away from each end of the ladder). Each ladder will take ½ can of commercial fruit filling.
.

Cut the dough, on both sides of the fruit, into equal strips, but be sure you stay about an inch away from the fruit filling. Pull the strips back over the fruit (one at a time) in a criss-cross fashion (the strips just lay on top of each other, don't crimp). The only part that is crimped is the very first strip (on each end of the ladder), it should be pinched together.
 
Bake the fruit ladder for 30-40 minutes (in a preheated 350 degree oven) or until lightly golden. Run a spatula under the ladder to make sure it is loose, and then slide it off onto a serving plate. Drizzle it with a simple powdered sugar glaze and decorate with nuts (I like candied nuts), sprinkles, or any decoration you like.

 
I have tried lots of different fruits, cherry, lemon, raspberry, blueberry, apple strawberry, blackberry, etc. Commercial pie filling works as well as home made.