Showing posts with label FROSTING. Show all posts

Friday 11 July 2014

SUPER EASY-PERFECT FROSTING

I've decorated cakes for decades and I've tried a ton of basic vanilla frosting recipes. Today's frosting is BY FAR the fastest, easiest and tastiest vanilla frosting I've ever used. It is light, fluffy, super easy to work with and it TASTES REALLY GOOD!!


BASIC VANILLA FROSTING
1 1/2 cups powdered sugar
1/2 cup UNSALTED butter (see important note below)
2 teaspoons vanilla extract (not imitation vanilla)
1/4 teaspoon almond extract (optional)
1-4 tablespoons cream  (milk will work in a pinch)

IMPORTANT NOTE: This frosting will taste terrible if you use regular salted butter; well, maybe that is a little misleading. Let's just say I DISLIKE this frosting when regular salted butter is used (it just tastes weird). So, use UNSALTED BUTTER !!

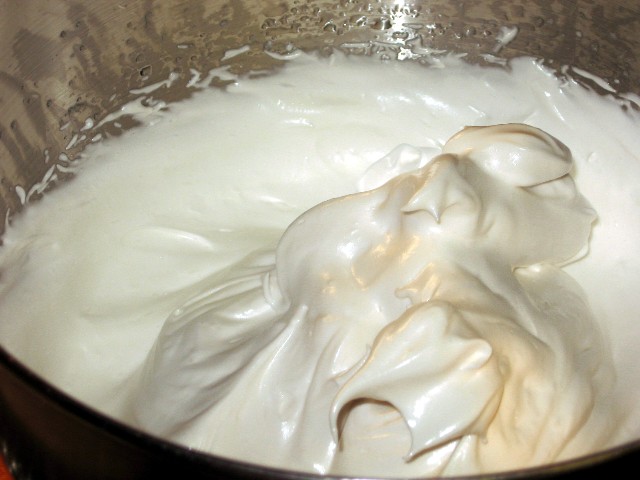
With an electric mixer (I like my stand mixer with the whisk attachment for this), beat the ROOM TEMPERATURE unsalted butter + sugar + extracts + 1 tablespoon of the cream until well mixed. If it seems dry, add another 1-3 more tablespoons of cream (1 tablespoon at a time) and  once you get the spreading consistency you want...beat it for a couple of minutes more, or until light and fluffy.

That's it!! It's so easy and pipes well through a bag and tip or spreads well with a knife. Sounds too simple, but try it, you'll love it.


ENJOY !!

Wednesday 10 July 2013

CAKE DECORATING 101

I don't profess to be a great cake decorator but I do "OK"; lets just say if I can do it, certainly YOU can do it; it isn't rocket science.

This post has a very good basic butter cream frosting recipe and a few tricks of the trade that I've learned over the years. Don't be nervous, just jump in and "give it a go". Practice makes perfect and your friends and family will love eating those "practice cakes" (our kids grew up on them).


BUTTER CREAM FROSTING

1 cup white Crisco vegetable shortening
1 cup butter (room temperature)
8 cups powdered sugar
1/4 teaspoon salt
3 teaspoons vanilla extract
1 teaspoon almond extract
2/3 cup heavy cream

With an electric mixer (stand mixer works best) beat the vegetable shortening and (room temperature) butter until it is well mixed together.

Add half of the powdered sugar, salt, extracts and half of the cream. Beat until very well mixed.

Add the last half of the powdered sugar and the last half of the cream.  Beat on high for 2 or 3 minutes until very fluffy (makes a lot of frosting).
 
 
NOTE: Some people freak out about shortening in the frosting and I understand that, but, remember.....when you buy a cake from a chain type bakery, the frosting is made with ALL shortening, trust me!!

If you are dead-set against using vegetable shortening, you CAN use all butter, but the taste is very heavy; it is your choice.

NOTE: This frosting is great for the entire cake including borders and piping words, etc., but it IS a soft frosting and it WILL melt if you have it out in the sun or in a very hot room.  I like to frost  my cakes and then chill them until about an hour before serving.

If you don't have time to freeze the cake, just make sure it is completely cooled before frosting it (not even just a LITTLE bit warm).

DECORATING TIPS

Cupcakes are very popular right now and they are super easy to do. Using the above frosting recipe and a Wilton M1 decorating tip, you can have cupcakes that look like they came from a bakery in no time; that big M1 tip is the secret.


The following mini-lesson, is for a simple "every day" one layer 9x13 cake.

1. Brush all the crumbs off of the cake (you will thank me later)because it is easy to get the crumbs mixed in with your frosting and that isn't pretty.

2. I like to wrap or cover my HOT cake with saran wrap (right on the surface of the cake) and then let it cool down and put the wrapped cake in the freezer overnight.  The day you want to serve the cake, take it out of the freezer and frost it while it's still frozen. A frozen cake is sturdy and the frosting stays right where you put it.
Don't put it back in the freezer!!  The frozen/frosted cake will thaw out in about 60-90 minutes and be perfect for serving.

3. Put a thick layer of frosting all over your cake; don't worry about it looking smooth at this point, just try to cover it evenly.


4. Now here is a little trick that I learned a million years ago. Get a small fine mist spray bottle (that isn't used for anything else) and fill it with cold water. Give the frosting a light mist (from the distance of about a foot(just a super quick fine spritz) then smooth the frosting with a smooth bladed knife(wiping off your knife in between each stroke).  I always use an off-set spatula for this (see photo below) but any non-serrated knife will work in a pinch.

If you don't have a spray bottle, you can almost get the same effect by dipping your spatula into very hot water (then shaking off all excess water) before smoothing your frosting. This next picture shows what just ONE SWIPE around the sides of this cake (using the warm wet knife method) will do; you can imagine if you went over it a couple more times.


 If you are a perfectionist  (which I am not) and want NO frosting lines, just keep smoothing.

IMPORTANT NOTE: Only use the spritz technique on white frosting. If you use it on colored frosting, it will run and make your frosting look uneven....especially blue or green.

5. You can go crazy and buy all sorts of decorating tips and doo-dads, but you certainly don't need them.  Get just get a few of the basics and you will be amazed at what you can do.

You will need:
Disposable plastic frosting bags (a true MUST)
2-3 couplers (2 piece couplers let you change tips)
Decorating tips  (a large star and a round writing tip)
Off-set spatula  (not an absolute must, but very handy)
Food color paste (not the watery stuff) Check Walmart
Water bottle for misting


After you "flat frost" the whole cake, it is time to put on the borders/trim and any writing or drawing  you want on the cake. Now is the time you will use the frosting bags and metal tips.


6. The disposable frosting bags are probably the handiest part of this process. You can use non-disposable ones, but once you try to wash one, you will quickly see the "beauty" in the disposable kind.

7. The couplers, are not absolutely necessary either. You can just slide the metal decorator tips down inside the frosting bag and snip off the end. However, if you want to use a variety of decorating tips, the coupler is the way to go. Each one has two pieces; the larger part slides down inside the frosting bag and then the metal tip fits onto it from the outside, then the coupler band is screwed on (does that make sense?)


Once you have the decorating tip on, nestle the decorator bag inside of a large mug or measuring cup and fold the top raw edge down over the container, sort of like folding down a collar. Now put a cup or two of frosting in the bag (the "container" is just to hold the bag steady while you fill it).

Twist the top of the frosting filled bag closed and apply pressure with your fingers. As the frosting comes out the end, you will have to re-twist it tighter before continuing. When you are done using the frosting bag, just use scissors to cut the bag off just above the coupler, then throw the coupler and tip into the dishwasher!!

The base of your cake should have the larger frosting border than the top edge of your cake. Practice making a shell pattern on some wax paper before you try it on the cake.


8. I like to use a Wilton M1 tip on my cake base; it is a huge star tip and it takes an over sized coupler as well.


NOTE: When you first start to decorate, you will be fairly slow. Keep in mind that the heat of your hands can soften the frosting in the frosting bag and that can be a problem. If you find it getting too soft to hold its shape, put it in the fridge for about 20 minutes.

NOTE: Don't use regular (watery) food coloring in this frosting recipe; not only will it effect the consistency of your frosting, but the colors will  never get any stronger than a pastel color. 

Get some food coloring paste (it is very concentrated and gives you very deep colors, so go easy with it at first); one drop of blue will color an entire bowl of frosting. 

Walmart sells the food color paste in their cake decorating section.

NOTE: A fun thing to try is edible glitter. It is basically a transparent food starch that has been dried and flaked, but you can sprinkle it on ANY color frosting and it will look shiny and sparkly; it is GREAT for cupcakes or little girl princess cakes.

Another fun decorating tip is called a grass tip.

Grass Tip
 
Using a grass tip is super easy, you just apply lots of pressure, then immediately release the pressure and lift up at the same time which will make "blades" of grass.
 
 
GIVE IT A TRY !! BUT MOST OF ALL ...


HAVE FUN !!!

Sunday 26 August 2012

CHOCOLATE PEANUT BUTTER FROSTING

This is a POSITIVELY DELICIOUS frosting recipe. What a nice variation from classic chocolate frosting!! It has a smooth, thick texture and tastes great by the spoonful!!


This is my new "go to" recipe for frosting snack cakes, brownies and cupcakes, it is quick, easy to make and tastes great!!

1/2 cup smooth peanut butter (I used Jiff)
1/2 cup unsweetened cocoa powder
1/4 teaspoon salt
1 teaspoon vanilla extract
1/2 - 3/4  cup half and half (see note)
2  2/3 cup confectioners sugar

Mix the peanut butter, cocoa powder, vanilla and a few tablespoons of the half and half until it is smooth and creamy.  Add the sugar, salt and the rest of the half and half (*see note below).   Beat with electric mixer until smooth and shiny.

That's it... what could be easier?!?  We LOVED this frosting!!

NOTE: The recipe said to start with half cup of the half and half and if you want it thinner, add the remaining 1/4 cup of half and half (one tablespoon at time)...beating until smooth.

Tuesday 31 January 2012

COOLEST TIP EVER!!!

I found this little gem of a video yesterday and it was instantly one of those moments where you close your eyes and think to yourself...DUH!! Why didn't I know about this 20 years ago!!!

If you EVER use frosting bags and tips, you HAVE to watch this video from Karen's Cookies. It will make your day, I promise!!


Tuesday 25 October 2011

STRAWBERRY FROSTING

This quick and easy strawberry frosting is just delightful. I used fresh strawberries, but I see no reason why frozen (thawed) strawberries wouldn't work.  It has a light, fresh, fruity flavor and was a big hit at my house.
1 cup UNSALTED butter at room temperature
4 cups powdered sugar (see note)
1 teaspoon vanilla
dash salt
5 tablespoons strawberry puree (see note)

Whip the butter, with electric mixer, until light and fluffy. Beat in powdered sugar, one cup at a time, scraping the sides of the bowl occasionally.

Add the strawberry puree (I just pureed fresh strawberries in my food processor), vanilla and salt. Beat till smooth.

NOTE: The liquid of the strawberries will vary for everyone. If your frosting seems too soft, just add extra powdered sugar (a little at a time) until you get the consistency you want.  If you are going to use this for piping trim, you'll have to add at least another cup to a cup and a half of powdered sugar.
NOTE: This recipe will easily frost 2½ dozen cupcakes if you are just frosting them with a knife.

Saturday 9 July 2011

SWISS MERINGUE BUTTERCREAM FROSTING

Everyone is familiar with commercial bakery "buttercream" which is commonly made with shortening and it leaves a greasy or waxy film in your mouth, yuck!!  Todays recipe is for a light and fluffy frosting (almost the consistency of whipped cream) called Swiss meringue buttercream. It is the creme de la creme of all frostings and it is slightly sweet and extremely stable.


The recipe has a few steps, but it is well worth the effort and as long as you follow a few tips, it is NOT hard to make.

5 egg whites (from large eggs)
1 ¼ cups granulated sugar
1 pound of UNSALTED sweet cream butter (room temperature)
Small pinch of salt
2 teaspoons vanilla extract
1 teaspoon almond extract

Place the egg whites and sugar in a glass or metal bowl (whisk together until well mixed) and place the bowl over a gently simmering pan of water (don't let the bottom of the bowl touch the water).


Now here is a tip; right after you mix the sugar into the egg whites, press some of the mixture between your fingers and you will feel a grainy texture (remember that feeling). Heat the egg white-sugar mixture (whisking every 30 seconds or so) for about 3 to 5 minutes or until it reaches 140 degrees on an instant read thermometer.  NOTE: If you do not have an instant read thermometer, just heat the mixture until it feels nice and warm (not hot) and you can no longer feel that grainy texture when you press some of it between your fingers. Remove from heat.

Pour the warmed egg white - sugar mixture into the bowl of your stand mixer and attach the wire whisk. Beat the mixture on medium high for 5 to 7 minutes or until the mixture forms a thick and fluffy meringue that is cool to the touch. It is VERY IMPORTANT that the mixture AND the outside of the bowl have cooled down to room temperature.

Stop the mixer and change to the paddle attachment. With your stand mixer at medium speed, start adding the ROOM TEMPERATURE butter, two tablespoons at a time, beating 20 to 30 seconds after each addition. Stop the mixer occasionally and scrape down the sides to make sure everything is mixing well.

After you have added all of the butter, add the extracts and beat on medium high until light and fluffy (another minute or two). Use immediately.

TIP: You want the butter to be at room temperature but not super soft/melty(very important). I cubed the butter when it was COLD and then let it sit on the counter for an hour to insure it would be at room temperature (of course that depends on how warm your house is). Do NOT warm up your butter in the microwave.


This frosting is a dream to work with!!! It is EXCELLENT for borders and trim work (it is VERY stable) and it is very forgiving when doing flat work (smooths easily with a knife).
 
NOTE:  If you start adding your butter too early (while the meringue is still too warm), the frosting will separate or look curdled.  Don't panic, just keep beating on medium high and it will eventually come back together and whip up correctly, I promise!!

NOTE: Do not use SALTED butter, I tried that once and I was amazed how salty the frosting tasted!!!


Tuesday 10 May 2011

CHOCOLATE CREAM CHEESE FROSTING FOR MY BIRTHDAY

Follow Me on Pinterest
Can it be my birthday again, already? They seem to come every six months lately. I usually treat myself to a baked goody on my birthday; come to think of it, it almost always involves chocolate, big surprise!! This is my favorite chocolate frosting, it is quick, easy, deliciously smooth on the tongue and it pipes beautifully!!!


¼ cup butter (warm but not melted)
½ cup baking cocoa
8 ounces cream cheese (room temperature)
1 teaspoon vanilla
4 cups powdered sugar

Mix the cocoa and vanilla into the warm (but not melted) butter, beat until smooth, set aside. Beat the cream cheese until smooth (scrape the sides of the bowl so that you get it all mixed), then add the butter-chocolate mixture and beat until it is all smooth.

Beat in the powdered sugar, one cup at a time, beating well after each cup until smooth and enjoy.

NOTE: If I'm feeling adventurous, I add a little orange zest to this frosting.

Friday 26 November 2010

STURDY BUTTER CREAM FROSTING

Traditionally, butter cream frosting is made with butter, powdered sugar and flavorings, however, I find the recipes that use all butter, tend to be heavy tasting, hard to work with (it melts and sags too easy) and not the light fluffy frosting people expect.
.


I've decorated cakes for years and I keep coming back to this easy, user friendly and fluffy frosting recipe, made with half butter and half white Crisco. Don't freak out about using Crisco in your frosting, you won't be able to tell it is there (100% shortening is what most commercial bakeries use to make that fluffy frosting we all love) and, as you can see, it pipes nicely.
.1 cup white Crisco shortening
1 cup butter (room temperature)
6 to 6½ cups of powdered sugar
½ cup whipping cream
2 teaspoons vanilla extract
1 teaspoon almond extract (important)

In the large bowl of a stand mixer, whip the shortening and butter together for about 3 minutes on high. Add 6 cups of powdered sugar, the extracts and whipping cream to the butter mixture and whip ON HIGH for about 8 to 10 minutes.

After that amount of time, check the frosting for consistency. Usually, the frosting is perfect, but if your climate is different from my climate, you may want to add an additional ½ cup of powdered sugar.

Once you frost your cake, put it in the fridge to let everything "set". Remove your cake from the fridge about an hour before serving.

NOTE: This frosting works best in a stand mixer, although you can make it with a hand held mixer (it will just take a little extra time).

Wednesday 10 November 2010

KID FRIENDLY JELLO FROSTING!!

UPDATE: New sugar free option at the end of this post.

UPDATE: Since posting this on Pinterest, a few people have commented that  this frosting deflated on them after a day at room temperature. I've never had this problem, because I live in a DRY climate, but those of you living in HUMID climates are having this problem. So... if you live in a humid climate, you'll need to store the frosted cake in the fridge.
~~~~~~~~~~~~~~~~~~~
This frosting recipe has a lot of things going for it. It is fast, super light, smooth and creamy on the tongue (very similar to a 7 minute frosting, but so much easier). Neatest of all, is that it is flavored with jello, so you can make it in ANY Jello flavor you like...watermelon? blueberry? pina colada? Kids will LOVE this frosting.

3 ounce pkg. of Jello (favorite flavor)
2/3 cup granulated sugar
1 egg white
1 teaspoon vanilla
1/2 cup BOILING water

Place the Jello powder, granulated sugar, egg white and vanilla in a GLASS OR METAL mixing bowl of a stand mixer. DO NOT USE PLASTIC and make sure your glass or metal bowl is clean of any grease or oil.

Turn the mixer on HIGH and immediately add the half cup of BOILING water. Whip on high for five minutes and you will get this:

 NOTE: This recipe only seems to work if you use a  stand mixer, with whisk attachment. Also, make sure you use a glass or metal mixing bowl, do not try this with a plastic bowl.

NOTE: Some people have commented that they don't think raw egg whites are safe for children to eat. The egg whites in this recipe are no longer raw after you add the BOILING WATER.

NOTE: This recipe makes enough to frost 24 cupcakes, or a 9 x 13 cake. If you are going to do any piping or edges, you might have to double the recipe.


NOTE: This frosting pipes beautifully and holds its shape well. Like any 7 minute type frosting, it does get a little sticky/tacky the second day, so its best if you make it the day you want to serve it. If you have to make it the night before, just store it in an airtight container that doesn't touch the frosting.


NOTE: This frosting has so many fun possibilities for birthday cakes/cupcakes. It would also make a wonderful filling.


SUGAR FREE FROSTING OPTION

Since putting this recipe on Pinterest, I have heard from several people who are wondering about the possibility of sugar free jello and Splenda...well, I had to try it.

First of all, we didn't like it as much as the original recipe (with regular jello and granulated sugar). The taste was good, but the texture of the sugar free version + Splenda was just a little too foamy for us (that didn't stop us from eating it though...lol)

I followed the original recipe, substituting exact amounts with the sugar free products
I used 2/3 cup of granulated Splenda, 1 egg white, 1 teaspoon vanilla and a small (4 serving) size box of sugar free jello.  I mixed those items together in my stand mixer and added 1/2 cup of BOILING (not just hot) water while the mixer was running on HIGH. Let the boiling water run down the inside of the mixing bowl, so it cools off a couple degree's before hitting the egg white.

Mix on HIGH setting for at least 5 minutes (will take longer if you are in a humid climate). After 5 minutes, my frosting looked like this:

It was very foamy, and almost tasted like a sweet fruity meringue.  It still pipes nicely, here's an example:

I'm  not sure whats up with the sparkle; the final frosting DID have a "fairy tale shine" to it, and I thought perhaps it might have a granular taste, but it didn't; it was very smooth.

I  let this frosting sample set out at room temperature for several hours to see if it would deflate (it didn't), but it did form a VERY THIN crispy crust (keep in mind I'm in a dry climate). I also put a similar frosting sample (uncovered) in the fridge and after a few hours, there was NO appreciable difference between it and the sample I kept at room temperature.

It's hard to explain the mouth feel of this sugar free frosting, maybe a photo will help:

I cut the frosting sample in half... it tasted sort of like a cross between a sweet meringue and a wet marshmallow whip... does that make sense?

My conclusion: We liked the original recipe better, however, if your dietary concerns require a sugar free frosting, this is worth a try!!


Sunday 16 May 2010

FLUFFY WHITE FROSTING

Follow Me on Pinterest

This is a fantastic frosting recipe, for many reasons. First of all, it is delicious. After that, it is super easy, super quick, it takes no special ingredients, it is pretty to look at and it is very versatile. It is a classic.

 In a large  GLASS OR METAL bowl, put two egg whites, a teaspoon of vanilla extract and ¼ teaspoon of almond extract...set aside.
.
In a saucepan, mix 1 cup of granulated sugar, ¼ teaspoon cream of tartar, dash of salt and 1/3 cup of water. Cook and stir until it just comes to a boil and sugar dissolves.
.
Start beating your egg whites and extracts on HIGH while you slowly drizzle in the hot syrup. Keep beating on high until stiff peaks form like this:


With a hand held electric mixer, this can take up to 7 minutes, but with my stand mixer it only takes about 4 minutes. Recipe makes enough to frost a 9" two layer cake or a 10" tube cake.
NOTE: To get these lovely big swirls, use a Wilton tip # 1M...it is a huge tip and will duplicate these swirls with total ease...I promise.
Very light, this frosting is a dream to work with.

NOTE: The bowl AND beaters that you use, for this frosting, can have NO TRACE of grease or oil on them (or the frosting will not whip properly...right out of the dishwasher is perfect). A big stand mixer, like a Kitchen Aid, works the best, but this can be done quite successfully with a hand held electric mixer too (it just takes longer).

NOTE: While this frosting holds up well in all kinds of weather, it WILL form sort of a skin over the soft fluffy frosting if left in dry air for several hours. To prevent this, just cover it if you are not going to eat it the same day.