Showing posts with label CHOCOLATE DESSERTS. Show all posts

Wednesday, 27 August 2014

TRIPLE CHOCOLATE ZUCCHINI BREAD

Do you have a lot of zucchini this summer? If so, this is a great way to use it. This treat is super chocolate-y, super moist (in fact it gets even more moist on day two), super easy to make and freezes very well.


(2) one ounce squares of unsweetened chocolate (melted)
3 large eggs
3/4 cup brown sugar
3/4 cup white sugar
1 cup vegetable oil (I used canola)
2 cups shredded zucchini (squeezed dry then measured)
2 teaspoons vanilla
2 + 1/2 cups flour
1 teaspoon baking soda
1/2 teaspoon baking powder
1 teaspoon cinnamon
1 teaspoon salt
1/2 cup unsweetened cocoa
3/4 cup semisweet chocolate chips

Things to do first:
1. Preheat your oven to 350°
2. Toss the chocolate chips into the measured flour to get them well coated,that way they won't sink to the bottom of the bread as it cooks.
3. Grease two large (9" x 5") loaf pans. I lined mine with parchment and then greased the parchment (this bread tries to stick to the pan if you go light on this step, but with the parchment paper, the zucchini bread tips right out.


4. Shred the zucchini then squeeze some of the water out of it (with your hands) before you measure it.

Directions:

In large mixing bowl (I used my stand mixer), combine eggs, sugar, oil, grated zucchini, vanilla and melted chocolate. Mix until smooth.

Next, add flour (that you've stirred the chocolate chips into), cocoa, baking powder, baking soda, cinnamon and salt. Mix until well combined, smooth and shiny (just takes a 30 seconds or so).

Pour batter into 2 well greased large loaf pans and bake at 350­° for 60 to 70 minutes (my electric oven takes exactly 60 minutes) or until a toothpick inserted into tallest part of the bread comes out clean. Don't over cook.

Cool in pans on a rack for 15 minutes, then remove from pans. Wrap the bread in plastic wrap while they are still hot.  This keeps a lot of the moisture inside of the zucchini bread as it cools.  Don't slice the bread until it cools down completely.


If you are going to freeze them, cool completely, then double wrap them or wrap them in plastic wrap and put in a Ziploc freezer bag.

FUN TIP: If your children are picky eaters, just peel the zucchini before you shred them, that way you won't hear "Mom, what are these green specs?" They won't even know that the zucchini is in there!!


ENJOY !!

Saturday, 12 October 2013

FIVE STAR CHOCOLATE PUDDING

OK, I admit I have posted a lot of pudding recipes, but then again, I have tried many, many more pudding recipes than I have posted, so I've tried to hold back and post only the best ones...........Oh who am I kidding, WE LOVE PUDDING!!

With that said, today's chocolate pudding is BY FAR THE BEST ONE YET. It has a silky smooth mouth feel (important in pudding), a wonderfully deep milk chocolate flavor and it has a wonderful consistency.........it is REALLY good.


3 (slightly heaping) tablespoons bakers cocoa powder
1/2 cup heavy cream
2 1/4 cups whole milk
1/2 cup brown sugar
3 egg YOLKS
2 level tablespoons corn starch
2/3 cup milk chocolate chips
5 tablespoons butter (cut into pieces)
1 1/2 teaspoons vanilla

Whisk the cocoa, brown sugar and corn starch together and set aside.

Whisk the cream, milk and yolks together in a saucepan that has a nice heavy bottom (it prevents scorching). Add the dry mixture to the wet mixture and whisk until smooth. Make sure you scrape the corners of the pan because the corn starch likes to "hide" there.

Cook on medium heat (stirring) until it gets thick and starts to bubble all over the entire surface of the pudding. TURN THE HEAT DOWN to a level where it still bubbles (but isn't going crazy) and cook/stir for another 30 seconds.

Remove from heat and add the butter, milk chocolate chips and vanilla; whisk until melted and smooth. Now, if you REALLY want that super smooth and silky mouth feel, pour the cooked pudding through a mesh strainer, it really makes a difference but isn't absolutely necessary.

Pour into dessert dishes and lay a piece of waxed paper or plastic wrap right on the surface of the hot pudding (this will stop any "pudding skin" from forming). Chill for at least 4 hours.

NOTE: The quality of your milk chocolate chips makes a difference; make sure they are real chocolate, not imitation.

NOTE: Make sure you use unsweetened baking cocoa.

Friday, 10 May 2013

CHOCOLATE MARSHMALLOW BROWNIE PIE

I've noticed a trend on my birthday (which is today); it seems I always treat myself to something  CHOCOLATE!! Today's birthday post is ULTRA-chocolate (and delicious).

It starts with a rich brownie layer that you top with miniature marshmallows while it is still piping hot out of the oven. Then it is topped with a rich chocolate glaze and sprinkled with lots of toasted sliced almonds. It was heavenly!!

 
BROWNIE LAYER
In a small bowl whisk the following ingredients together:

3/4 cup all purpose flour
1 cup sugar
1/4 cup unsweetened cocoa powder
1 teaspoon baking powder
1/4 teaspoon salt

In a different bowl, beat the following together:

1/2 cup butter melted
2 large eggs
2 teaspoons vanilla

Add the wet ingredients to the dry ingredients and mix until smooth.

Place batter in a greased 9" round pan (spring form pan works the best) and bake in a 350°F oven for 25-30 minutes or until toothpick tests clean (my electric oven took 25 minutes).

Remove from oven (and turn oven off). Top HOT cake with miniature marshmallows (I used about 4 large handfuls) and put it back in the hot oven for 2-3 minutes or until marshmallows have puffed up a little. Remove from oven.

FUDGE FROSTING

6 tablespoons melted butter
6 tablespoons BOILING water
6 tablespoons dry cocoa powder
2 cups powdered sugar
1 teaspoon vanilla extract

Whisk until smooth. Gently pour (evenly) over the warm marshmallows and then sprinkle with TOASTED sliced almonds (nuts optional). If you don't like nuts, colored sprinkles look festive too.

Let everything cool off a little, then put it in the fridge for about an hour to "set" the chocolate frosting. Bring the cake back to room temperature before serving.

NOTE: You can bake this in ANY greased 9" cake pan, but a two piece spring form pan will allow you to remove the cake a little easier. If you use a 2 piece pan, make sure you put a cookie sheet under the pan.
 

Thursday, 25 April 2013

SIX MICROWAVE COOKIES

This fun little recipe is for those "I-need-some-chocolate-right-now-or-I'm-going-to die" moments in your life. Cookies from the microwave? Before today, I would have highly doubted their success, but my scorched tongue is proof that they ARE good AND that I was too impatient for them to cool off!!

This recipe only makes six small cookies, which is PERFECT better for my perpetual diet. Don't expect the same crispy cookie you would get out of the oven, but the taste is very much the same.

1 tablespoon butter (melted)
2 tablespoons brown sugar
1/4 teaspoon vanilla
pinch salt
1 egg yolk
1/4 cup all purpose flour
2 tablespoons chocolate chips

Mix everything and form into 1" balls, then flatten a little and put them on an UNgreased microwave safe plate. They don't spread much when they cook, so just put them an inch or so apart.

Microwave on high for 45-55 seconds (my microwave took 50 seconds). Now is the hard part......let them cool for a couple of minutes....then enjoy!!

NOTE: Do not be tempted to add any baking soda to this recipe.

Saturday, 9 March 2013

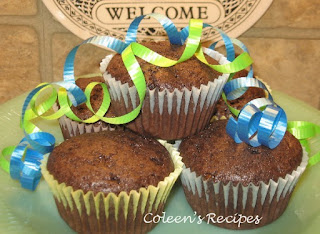
CHOCOLATE MUFFINS

SUPER moist, SUPER chocolate-y, SUPER EASY (mix with a spoon), these chocolate muffins are a great "fix" for that chocolate craving!!
2  2/3  cups all purpose flour
3/4 cup granulated sugar
3/4 cup brown sugar 
1/2 cup unsweetened baking cocoa
1 1/2 teaspoons baking soda
1/2 teaspoon salt
1/2 cup chocolate chips (I use mini-chips)

Mix the above dry ingredients in a large bowl, making sure they are all well combined. If you add the chocolate chips at this stage, they will not "sink" when the muffins are baked. I like to use mini-chocolate chips so the chocolate distributes evenly throughout the batter, but ANY kind of chocolate chip will work (mint is very good too!!)

In a different medium sized bowl, whisk the following wet  ingredients until smooth:

3 eggs
1 cup sour cream
1/2 cup coffee (cold)
1/2 cup milk
1/2 cup vegetable oil
2 teaspoons vanilla extract

After the wet mixture is whisked until smooth, add it to the bowl of dry ingredients and stir just until everything is moist.

Line cupcake pans with paper liners and fill 2/3 full with the muffin batter.  Bake at 325° for 20-25 minutes (my electric oven takes 20 minutes exactly). Test for doneness with a toothpick.


This recipe makes 3 dozen muffins

Sunday, 24 February 2013

Microwave Chocolate-Marshmallow Pudding

Super quick, super easy, rich and chocolate-y, and very inexpensive to make; this fun dessert will satisfy your chocolate craving for sure!! Equally delicious warm or cold, you can have this treat on the dinner table in no time.


1/2 cup brown sugar
1/3 cup unsweetened baking cocoa
pinch salt
3 level tablespoons corn starch
2 cups milk (see note below)
1 tablespoon butter
1 teaspoon vanilla
2 cups mini-marshmallows (optional)

In a large glass bowl, mix the brown sugar, cocoa, salt and corn starch. Slowly add the milk and mix well. At first the cocoa will sort of sit on top of the milk, but if you mix well with a whisk, it will mix together in a minute or so.

Microwave on HIGH for 3 minutes. Carefully remove from microwave, and stir well (again with whisk).  Put it back in the microwave (one minute at a time...stirring well after each minute) until the pudding is shiny and thick.  My microwave took the initial 3 minutes, then 2 more (1 minute) intervals), but everyones microwave is different, so just mix it well after each interval and when it is shiny and thick, it's done.

After pudding is thick, stir in butter and vanilla and mini-marshmallows. The heat from the pudding will melt the marshmallows, so don't stir them too much (you want them to stay whole if possible).  Chill the pudding in dessert dishes.


NOTE: I like to use whole milk in this recipe, but I make it with 2% milk a lot too.

NOTE: Marshmallows totally optional.

NOTE: Don't microwave this pudding in a plastic bowl because the plastic gets hotter than the pudding for some reason; glass is the best.

Thursday, 24 January 2013

Super Moist Chocolate Cupcakes

I found this quick, easy, delightful recipe on the For the Love of Cooking web site. It makes one dozen super moist, super chocolate-y, super yummy cupcakes. This recipe is going into my "5 star file", that is for sure.
 
 
1/2 cup white sugar
1/2 cup brown sugar
3/4 cup + 2 tablespoons flour
1/4 cup + 2 tablespoons unsweetened cocoa powder
3/4 teaspoons baking soda
3/4 teaspoons baking powder
1/4 teaspoon salt
1 egg
1/2 cup milk
1/4 cup canola oil (I used vegetable oil)
1 teaspoon vanilla extract
1/2 cup BOILING water

Preheat the oven to 350° and line a cupcake pan with 12 paper liners.

Sift together all of the dry ingredients into a large bowl. Add the egg, milk, oil and vanilla and beat together with an electric mixer until combined.

Scrape the sides of the bowl and add the boiling water, mix until just combined but smooth.

The batter will be very watery looking, so don't be alarmed.  Pour the batter evenly into the paper liners.

Bake in preheated oven for 20-22 minutes or until a toothpick tests clean. Remove from oven and cool before frosting.


Do you have a craving for chocolate?
Give this a try, they are great.

Thursday, 20 December 2012

CHRISTMAS FUDGE

Christmas is almost here and everyone I know is running around looking for that last minute mini-gift for the mailman, a teacher, the newspaper boy or even the UPS man!!

This fudge recipe is the perfect answer!! Not only is it quick and easy to make, but it tastes great and I love that it can be made way ahead of schedule.


4 cups white sugar
1 twelve ounce can of evaporated milk
8 ounces of real butter (no margarine or spreads)

2 cups milk chocolate chips
1 cup semi-sweet chocolate chips
1 cup white chocolate chips
1 TABLESPOON vanilla
chopped nuts if desired (we like honey roasted peanuts)

In a heavy bottomed sauce pan, mix the white sugar and evaporated milk; bring it to a boil over medium high heat.  Once it is at a full rolling boil (one that you can not stir down), turn the heat down to medium and boil for 6½ minutes (stirring CONSTANTLY). I stir with a wooden spatula that has a square end and I stir in a figure 8 (the flat blade of the spoon really scrapes the  bottom of the pan well).

After 6½ minutes at a full rolling boil, remove the pan from the heat and add the butter, a TABLESPOON of vanilla and all of the chocolate.

At first the butter will sort of stay separate from everything, but if you use a whisk, it will incorporate quickly. When it's all smooth, add the nuts if you are using them (as many as you like).

Pour into a FOIL LINED 9" x 13" pan and cool overnight in the fridge. If you are using these cute little tin foil stars (instead of the 9" x 13" pan), you can just wrap them in clear cellophane bag (after they are chilled) and tie it up with a bright Christmas bow!!

 MERRY   CHRISTMAS   FRIENDS!!!

NOTE: You can make this with any flavor chocolate chips you like.
I've tried them all and the only one I DON'T recommend is using ALL semi-sweet. The three chocolate blend listed above results in a wonderful flavor (you won't taste the white chocolate, but it adds a lot to the final taste).

Note: Make sure you use a good quality butter, not a soft spread butter or a diet butter and definitely no margarine.

Tuesday, 11 September 2012

PEANUT BUTTER BROWNIES with CHOCOLATE-PEANUT BUTTER FROSTING

We are huge fans of peanut butter and chocolate together, are you? This peanut butter brownie has peanut butter and miniature chocolate chips in the batter and a peanut butter - chocolate frosting on top...oh my, it was good!!!


1½ cups all purpose flour
1 teaspoon baking powder
¼ teaspoon salt
6 tablespoons butter, room temperature
½ cup smooth peanut butter
2/3 cup granulated sugar
2/3 cup brown sugar
3 eggs
1 teaspoon vanilla extract
1 cup miniature semi-sweet chocolate chips

Preheat oven to 350 and spray a 8" x 11" baking dish with vegetable spray.

After you measure the flour, remove a tablespoon of it and toss it with the miniature chocolate chips...set aside (this will keep the chocolate chips from sinking in the batter as they bake).

Cream the peanut butter and room temperature butter until smooth.  Add the sugars, vanilla and eggs and beat until smooth with electric mixer.

Add the flour, baking powder and salt and beat on low until combined (don't over-beat). Stir in the flour coated miniature chocolate chips.

Spread in the prepared baking dish and bake 35-40 minutes. NOTE: At 35 minutes, my brownies looked a little dark, so I just shut the oven off and let them sit in there for another few minutes. Use toothpick to test for done-ness.

Remove from oven and place pan on a cooling rack for 20 minutes or so before frosting. 


If you let these frosted brownies cool completely, they will cut cleanly like this.  

I frosted these with my chocolate - peanut butter frosting...posted HERE

Sunday, 26 August 2012

CHOCOLATE PEANUT BUTTER FROSTING

This is a POSITIVELY DELICIOUS frosting recipe. What a nice variation from classic chocolate frosting!! It has a smooth, thick texture and tastes great by the spoonful!!


This is my new "go to" recipe for frosting snack cakes, brownies and cupcakes, it is quick, easy to make and tastes great!!

1/2 cup smooth peanut butter (I used Jiff)
1/2 cup unsweetened cocoa powder
1/4 teaspoon salt
1 teaspoon vanilla extract
1/2 - 3/4  cup half and half (see note)
2  2/3 cup confectioners sugar

Mix the peanut butter, cocoa powder, vanilla and a few tablespoons of the half and half until it is smooth and creamy.  Add the sugar, salt and the rest of the half and half (*see note below).   Beat with electric mixer until smooth and shiny.

That's it... what could be easier?!?  We LOVED this frosting!!

NOTE: The recipe said to start with half cup of the half and half and if you want it thinner, add the remaining 1/4 cup of half and half (one tablespoon at time)...beating until smooth.

Tuesday, 10 January 2012

CHOCOLATE SILK PIE

Have you ever had a cream pie dessert that, was (not only) outrageously delicious, but the  "mouth feel" was absolutely sublime? That is the perfect description for this chocolate silk pie; it is the smoothest, creamiest, chocolate filling we have ever eaten!!


CHOCOLATE SILK FILLING

2 cups semisweet chocolate chips
2 cups heavy whipping cream (divided)
2 tablespoons powdered sugar
2 teaspoons vanilla
8 ounces cream cheese (room temperature)

In a small microwave bowl, mix the chocolate chips and 1/2 cup of the cream. Heat on 50% power for about 2 minutes, then stir. If they aren't completely melted and smooth, continue microwaving on 50% power (30 seconds at a time), stirring each time.  My microwave oven took the initial 2 minutes plus about 20 more seconds. COOL MELTED CHOCOLATE FOR 20 MINUTES BEFORE USING!!

In a different bowl, mix the remaining 1½ cups of whipping cream, powdered sugar and vanilla. Beat on high until stiff peaks form, set aside.

In another large bowl, beat the cream cheese until fluffy, gradually mix in the melted chocolate mixture, beating until very smooth.  Gently fold in the whipped cream with a rubber spatula. Do this slowly so you don't deflate the air in the whipped cream..

Fill your favorite pre-baked pie crust with the filling, smooth the top and chill at least 4 to 6 hours (better overnight).
 
 
This recipe overfills a 9" pie
or is perfect for a  10" pie
 
Top with whipped cream and enjoy!!


Wednesday, 4 January 2012

ALMOND TOFFEE GRAHAMS

If you like Almond Roca candy,
you will love this recipe !!
The first time I ate Almond Toffee Grahams was at a cookie exchange about 20+ years ago. With tons of cookies to choose from, I noticed people kept going back to the Almond Toffee Graham plate; one taste and I was "hooked".  When I found out how simple and fast they were to make, I was shocked (they taste complicated). I made them for some friends this Christmas and they were a huge hit !!


What do they taste like? Well, the cooked caramel sauce bakes into the graham crackers and produces a thin layer of candy that tastes like almond roca, then, with the melted chocolate and nuts added, what can I say; they are delicious !!
 
graham crackers
1 cup unsalted butter (no substitutes)
1 cup brown sugar packed (I like dark, but light is good too)
1 teaspoon vanilla extract
1½ cups sliced almonds (toasted)
1 cup semi-sweet chocolate chips

Preheat oven to 350. 

Now, a word about the pan:  This recipe uses a jelly roll pan (mine is 10½" x 15½" x 1").  The recipe says to grease the pan, but I don't like to do that (it makes for a greasy bottomed cookie). Instead, I use the new non-stick aluminum foil by Reynolds Wrap and I don't grease it at all (if you haven't tried it yet, it is well worth the price).  If you use regular foil, make sure you grease it.

Arrange graham crackers in a single layer on the jelly roll pan (should take about 15 graham crackers?). Try to leave as little space between the crackers as possible, but don't overlap them, you may have to break some of the crackers to make it all fit.

In a small saucepan, mix the butter and brown sugar. Bring to a gentle boil, and then set your timer for three minutes (stir constantly).

Remove from heat and stir in vanilla extract.  Pour the caramel evenly over the graham crackers and bake in preheated 350 oven for 10 minutes.

Remove from oven and sprinkle evenly with the chocolate chips.  Wait a few minutes for the heat of the candied crackers to melt the chocolate chips, then spread the chocolate with a knife.
Sprinkle the toasted sliced almonds over the melted chocolate.

Let the whole pan cool in the fridge for about 20 minutes (to set the chocolate).  When the grahams are completely cool, and the chocolate is set, lift out of the pan and peel off the non-stick aluminum foil. Break into pieces and enjoy.


Saturday, 6 August 2011

"Peanutella" Chocolate Peanut Butter Spread

I found this fabulous recipe over at Smitten Kitchen, and it was so much fun to make and even more fun to eat. If you like Nutella, you will LOVE peanutella, just think of the possibilities!!

Lets see, let me count the ways to enjoy peanutella: on waffles, on pound cake, on warm scones, in a sandwich, with s'mores, on waffles, as a fruit dip and...oh yes...right out of the jar!!!
2 cups shelled, skinned raw peanuts (see note)
½ cup unsweetened cocoa powder (best quality you can find)
1¼ cups powdered sugar
¼ teaspoon salt (plus a pinch?)
2 to 3 tablespoons peanut oil

Spread the nuts on a cookie sheet and roast in a 400F oven for 10 minutes, stirring half way through for even roasting.  NOTE: I couldn't find raw peanuts, so I used dry roasted UNSALTED peanuts and roasted them for only 5 minutes in the oven (to bring out more flavor).

Put the nuts in a food processor and process for five minutes. At first they will get mushy or pasty, but keep processing and the nuts will start to liquefy. Scrape down the sides of the food processor every once in a while.

Once the nuts begin to liquefy, add the cocoa powder, powdered sugar, salt and 2 tablespoons of peanut oil. Process for another minute or so. If the mixture seems too thick (it will thicken more in the fridge) add the other tablespoon of peanut oil. Taste the mixture, add another pinch of salt if you think it needs it.

That's it!! Store in the fridge (tightly covered) for up to a week.  This mixture might seem a bit thin at first, but it will thicken as it "sets" in the fridge.

Thursday, 21 July 2011

EASY CHOCOLATE PUDDING

I have been trying chocolate pudding recipes for several months now.  Today's chocolate pudding post is deliciously smooth and creamy, it is perfect. Even picky-picky husband gave it a thumbs up!!

 
1/2 cup brown sugar (I used dark)
3 rounded tablespoons unsweetened cocoa powder
1/4 cup cornstarch
pinch salt
(2) 12 ounce cans evaporated milk  (not low fat) (see note below)
1 tablespoons strong coffee
2 tablespoons butter
1 teaspoon vanilla
1/2 cup chocolate chips (or peanut butter chips)

In a bowl, whisk all of the dry ingredients together until there are no lumps (this will also help incorporate it into the liquids).  Whisk in the evaporated milk and coffee, until smooth.

Bring to a boil over medium heat, stirring constantly with rubber spatula. When the mixture starts to thicken, turn the heat down to medium low. Once it starts to bubble, continue cooking, stirring constantly (in figure 8 motion), for one minute.

Remove from heat and stir in butter, chocolate chips and vanilla; stir/whisk until chocolate is melted. Pour into dessert dishes and place plastic wrap or waxed paper directly on the surface of the hot pudding so it doesn't form a "pudding skin" while it is cooling.  Chill completely and serve with whipped cream.


NOTE: This recipe can be made using whole milk, but the evaporated milk gives it a much creamier taste and texture, I was very surprised at the difference it makes.

NOTE: As a child, my mother used evaporated milk a lot (even in our cereal!!), so I don't have many fond memories of that taste. However, there is NO evaporated milk "taste" in this final pudding, instead, the creaminess really comes through (so much more so than with regular milk).

NOTE: The chocolate intensity of this pudding is what I would call  "medium". If you like a pronounced chocolate flavor, I suggest you use HEAPING tablespoons of cocoa powder instead of rounded tablespoons.

Wednesday, 6 April 2011

CHOCOLATE MAGIC SHELL


This fast and fun recipe is a delicious chocolate sauce and when you put it on something cold, it turns hard like commercial "Magic Shell" (except a lot more budget friendly). Don't restrict it to ice cream though, how about frozen bananas?

1 cup semi-sweet chocolate chips
¼ cup butter
¼ cup canola oil
¼ teaspoon vanilla extract


Heat the chocolate, butter and oil until the chocolate melts. I do this in the microwave, starting at 30 seconds on high, then stir, then 15 more seconds and stir and a final 15 seconds and stir. At first, it will seem like the ingredients don't want to blend, but whisk it for 10-15 seconds and it will go together beautifully. Once it is smooth, whisk in the vanilla extract.

Cool to room temperature, (you can use it right away, but while it is still hot it will take a few seconds for it to harden on ice cream).


NOTE: If you use your microwave to melt the chocolate, watch it carefully, since your microwave might cook faster or slower than mine and chocolate scorches easily.

NOTE: With the addition of butter & oil, I thought this might have a greasy taste, but it does NOT. While warm (which is my favorite) this has a velvety texture, almost like the best hot fudge sundae taste.

Monday, 7 March 2011

RASPBERRY CHOCOLATE SHORTBREAD BARS

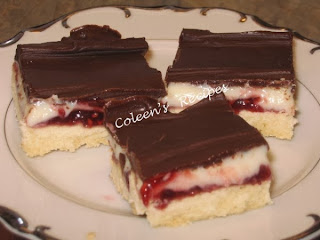
These dainty bars are delicious. They have a super tender shortbread base, a layer of sweet jam, then a layer of sweetened cream cheese & white chocolate and finally, a soft chocolate frosting.

The recipe says to chill them, but I think they are even better when they've been out of the fridge for 30 minutes, although when you do that, they are a little messy on the fingers, but Oh! so worth it!! Any flavor jam will work well, I just think that raspberry and chocolate go so well together.


 1 cup all purpose flour
¼ cup confectioners sugar
½ cup butter room temperature
½ cup raspberry jam
3 ounces cream cheese room temperature
2 tablespoons milk
1 cup white chocolate chips
3 tablespoons melted butter
3 tablespoons boiling water
3 tablespoons unsweetened cocoa powder
½ teaspoon vanilla extract
1 cup confectioners sugar

.
Preheat your oven to 375 and line a 9" x 9" baking dish with foil or parchment. Leave the ends extra long, so you can use them to lift the bars out of the pan after they chill. This is not a necessary step but it makes them easier to cut.
.
Cut the butter into the all purpose flour + powdered sugar until crumbly. Press into the bottom of an ungreased pan and bake for 15 to 17 minutes or until lightly golden brown. Remove from oven and set aside.
.
FILLING
Spread the jam over the baked cookie base. In a small bowl, beat the cream cheese and milk until smooth. Melt the white chocolate chips and add to the cream cheese mixture, mix until smooth. Gently spread over the jam (see note). Chill.
.
FROSTING
Whisk together 3 tablespoons melted butter, 3 tablespoons boiling water, 3 tablespoons unsweetened baking cocoa, ½ teaspoon vanilla extract and 1 cup of confectioners sugar until smooth. Gently frost the chilled bars. Put back in fridge to set the frosting. Store completed bars in the fridge.

NOTE: I melted my white chocolate in the microwave, checking on it every 15 seconds or so. I gently spooned the white chocolate mixture on top of the jam layer (tablespoon at a time) then gently spread it out, so as not to keep the layers separate. Chill the bars thoroughly after you do this step. When chilled, then spread the chocolate frosting on.

NOTE: I haven't tried it, but I think this would double easily and bake in a 9" x 13" pan.

Saturday, 12 February 2011

MICROWAVE BROWNIE FOR ONE !!

 They say that you are not supposed to reward yourself with food...OK, I get that. But every once in a while, I crave something deeply chocolate, deeply warm, gooey and rewarding. This recipe fills that bill perfectly and since it is only a single serving, there isn't a whole pan of calories calling your name the rest of the day.
 
.
I've been looking for a single serving brownie recipe like this for a long time because Hubby doesn't like brownies. I've tested lots of contenders with little satisfaction until now. The best part of this recipe, is that it is ready to eat in less than 5 minutes. The most "dangerous" part of this recipe is that it is ready to eat in less than 5 minutes...hahaha!!
.
MICROWAVE BROWNIE FOR ONE
.
¼ cup all purpose flour
¼ cup brown sugar
1/8 teaspoon baking powder
2 tablespoons cocoa powder
3 tablespoons milk
1 tablespoon butter (room temperature)
1 tablespoons pecans (optional)
2 tablespoon chocolate chips
.
In a small microwave safe bowl, mix everything together until smooth (mixture will be very thick). Cook in the microwave.
.
Now here comes the only tricky part of the recipe. Total cooking time in the microwave is one to two minutes depending on how powerful your microwave is. My microwave is a 1000 watt machine and it takes one minute 20 seconds. You will have to watch yours carefully the first time you cook this treat, so you don't over bake it (use the toothpick test for doneness the first time). LET THE BAKED BROWNIE SIT FOR ABOUT A MINUTE.
.
NOTE: I am embarrassed to say I know this recipe by heart now. Any flavored chocolate, peanut butter, white (etc.) chips will work well.
.
NOTE: The recipe doesn't say you have to, but I bake mine in a little ramekin that I spray with cooking spray.

Tuesday, 18 January 2011

FUDGE CREAM PIE

I decided to try this chocolate pie recipe because it looked so simple. You do not have to temper the eggs, no complicated steps and multiple bowls to deal with. It is super quick, super easy and produces a super thick chocolate filling. It was a huge hit for the chocolate lovers at our house!!


 9" baked pie crust
1¼ cups white sugar
2 tablespoons flour
4 tablespoons cornstarch
¼ teaspoon salt
2 cups milk
4 egg yolks
2 one ounce squares unsweetened chocolate
1 tablespoon butter
1 teaspoon vanilla extract

In medium saucepan, combine sugar, flour, cornstarch and salt. In a medium bowl, beat milk and egg yolks until smooth. Gradually stir the milk mixture into the saucepan that has the sugar mixture in it. Cook over medium heat (stir constantly) until the mixture comes to a full boil. Boil and stir for a minute or two or until it's very thick.
Remove from heat and stir in the chocolate, butter and vanilla until the butter is melted. Pour into baked pie shell.
Place plastic wrap directly onto the surface of the hot filling (this will prevent a skin from forming on the pudding). Chill overnight. Top with whipped cream and chocolate curls.


Thursday, 18 November 2010

FUDGE FILLED PEANUT BUTTER COOKIES

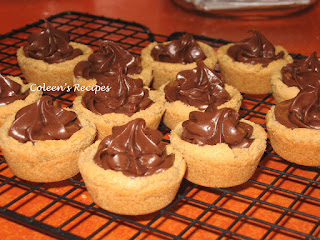
This impressive (but very simple) cookie will be great for the holidays. It consists of a sweet peanut butter cookie shell, filled with a rich fudge filling. When you first make the cookies, the filling is soft enough to pipe (or you can spoon it into the shell). However, after it completely cools, the filling is the consistency of a soft fudge. They are delicious, and look so pretty!!!

 
1/2 cup butter (room temperature)
1/2 cup creamy peanut butter
1/2 cup white sugar
1/2 cup brown sugar
1 egg
1 teaspoon vanilla
.
Cream the above ingredients together until smooth, then add:
.
1  1/4 cups all purpose flour
3/4 teaspoon baking soda
1/2 teaspoon salt
.
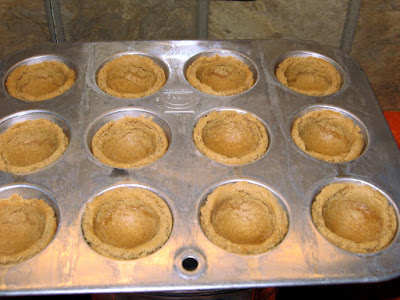
Beat everything until very smooth. Shape dough into 1" balls (makes about 4 dozen) and place each ball into the bottom of a mini muffin tin (ungreased) like this:

Bake in a preheated 375 oven for about 10-11 minutes or until they look like this:

After they are baked, find something in your kitchen that has a round end that you can use to press down on the center of these HOT cookies (to make the shell shape). I used the large rounded end of my mortar and pestle, but anything will work. Just be careful not to press so hard that you break through to the bottom. They should look like this:
Let these cookies cool (in the pan) for 10 minutes, then use a thin (but pointed) paring knife to assist you in lifting the cookie shells out of the pan (they come out pretty easy). Cool shells on a baking rack.
.
FILLING
 
1 cup milk chocolate chips
1 cup semi-sweet chocolate chips
1 (14 ounce) can sweetened condensed milk (not evaporated)
1 teaspoon vanilla extract
 
.
Melt the chocolate in a double boiler over simmering water (I just used the microwave). With an electric mixer, beat in the sweetened condensed milk and vanilla until smooth. Fill the cookies.
 
The fudge dries to the touch
after it is completely cooled.